Tuesday 29 March 2016

Berry71Bleu Design Team Reveal March Challenge - Timeless

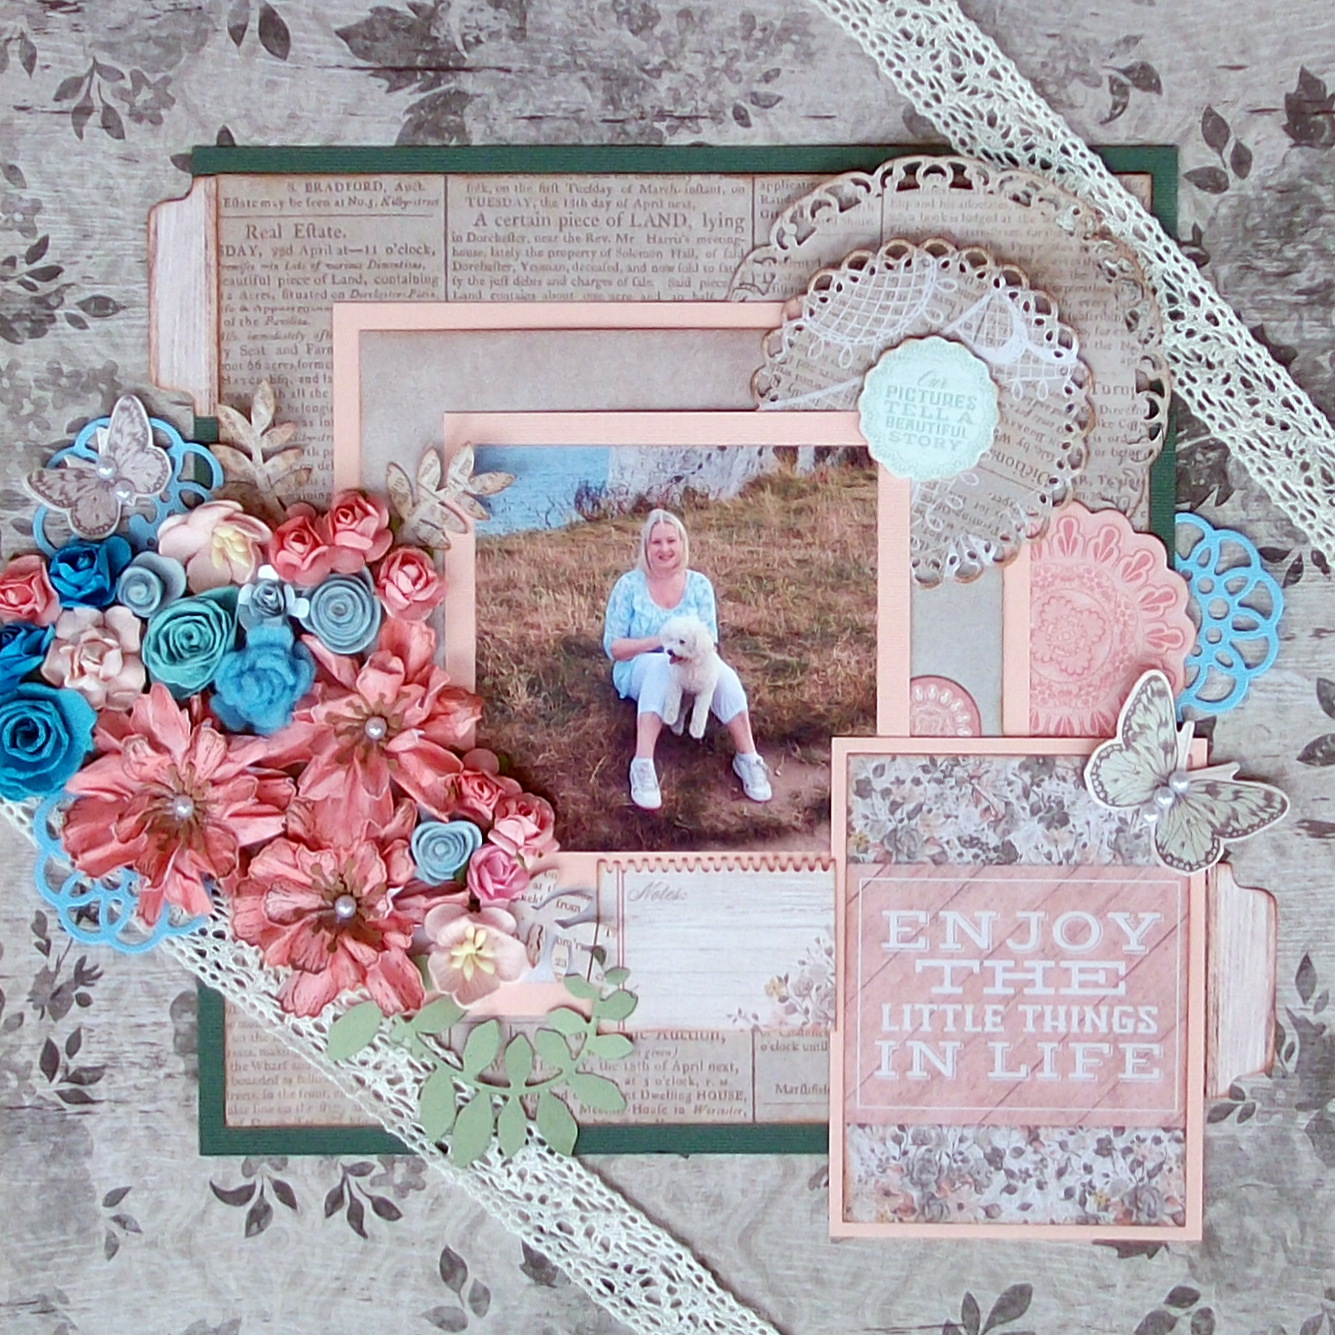
Hi everyone and welcome to my blog and my latest design team reveal for Berry71Bleu Design Team March Challenge Mood Board. I love this mood board, these are my colours and style so I really enjoyed making this layout. This is a picture of Jessie doing a photo shoot in a wedding dress. They were at the beach, it was freezing cold, she was really patient and it was so worth it as they ended up with this fabulous photo. I think she did really well.
So I used the photos and the statement for my inspiration.
I have used Blue Fern Studios papers and chipboard for this layout and have entered it into their March Sketch Challenge here Blue Fern Studios

SUPPLIES USED
Blue Fern Garden papers - Blue Fern Studios
Gabrielle Butterfly Set Chipboard - Blue Fern Studios
Sentiment strips - Blue Fern Garden papers
White doily
Pieces of lace
Sticky back pearls
Hessian flower
Punched out butterflies
Mini key
String
Assorted flowers
Pearly stamens
Mini clock
Swirl
Brown Chalk Ink
Large white paper clip
Dictionary paper.


And now for the prize.
Sponsor


UmWowStudio is a US based manufacturer of chipboard, stencils/masks, and flair for the general artsy community. Our products make great additions to cards and scrapbooking as well as mixed media pieces, altered art, tags, canvases, art journaling and more. Our chipboard is extra heavy duty to stand up to any mediums you can manage to throw at it. Our stencils and masks come in a super thick durable plastic to give your pieces extra dimension, and our flair is flat backed for easy use.

Connect with us! Visit us on FACEBOOK, view our BLOG, we're on INSTAGRAM, PINTEREST and our shop can be found at UmWowStudio.com


Um Wow Studio has give the winner a 30 USD Gift Certificate!


Please note: International winners may be responsible for shipping costs.
Please be sure to follow our CHALLENGE RULES.
You still have a few days left to enter our challenge where you can win this fabulous prize.
xxx
 I hope you like my layout and become a follower of my blog.
Photography by Shealan Faere Photography

Many thanks for visiting me today.
Bye for Now
xx

Thursday 24 March 2016

CRAFTERS PALETTE MARCH PAGE MAP CHALLENGE LAYOUT - ENJOY


Hi everyone and welcome to my blog and the CRAFTERS PALETTE DESIGN TEAM REVEAL.
Today I am up on the blog with our March Page Map Challenge.
I created this layout using some more Kaisercraft Rustic Harmony papers and collectables.


For this layout I chose to make most of my flowers by hand.
I used felt and mulberry papers and some scalloped edged scissors and flower dies.
PRODUCTS USED
Kaisercraft Rustic Harmony collection papers and collectables
Bazzil cardstock
Lace
Brown ink
Felt
Scalloped edge scissors
Large flower dies
Leafy punch - Woodware
Sticky back pearls.
xxx
I love this challenge as I get to use lots of flowers!
And I love making my own, as you can make them to match your page/card. Gather together any flower punches and dies you have, use co-ordinating papers and away you go.


I hope you enjoyed todays page map challenge, we would love to see your take on our sketch.
I would love it if you would come and follow me.
Thank you so much for visiting today, Bye for Now.
xxx


Monday 21 March 2016

Latest Birthday Card

Hi everyone and welcome to my blog and my latest card.
I made this using a 6 x 6 card blank, pretty papers, doily, lace, assorted flowers, pearl stick pin, leafy die cut, string pearls, lace flower, brown chalk ink and a birthday sentiment.
Heres How
Cover the card front with polka dot paper, ink edges
Using a template cut out a scallop shape in pretty paper, ink edges
Adhere a white doily slightly off centre
Add a border of lace
Adhere a small strip of lace and a small strip of pearl flowers
Start to decorate with mini roses, hand rolled roses and a stick pin
Add a lace flower, pearl flower centre and a small butterfly.
I used hot glue for the flowers.
Forgot to say I have entered this into the March 
WORDS AND PAINTERY Challenge
 
Here is how to make the flowers 
http://theprettypaperpatisserie.blogspot.co.uk/2013/03/hand-made-flowers-tutorial.html
I hope you have fun making this card and I would love it if you became a follower, just click on the left sidebar followers link
Many thanks for visiting me today see you in a few days for another reveal.
Bye For Now
xxx

Saturday 19 March 2016

THE ROBINS NEST DESIGN TEAM REVEAL - MARCH 19th SPRING THEME LAYOUT - THIS GIRL

Hi everyone and welcome to my blog. Today I am up on the ROBINS NEST blog with my latest March Project. As soon as I saw this amazing paper I knew exactly the photos I wanted to use. They are not the best quality as Jess took them on her phone, but I just love these hat pictures and they remind me of Spring.


SUPPLIES I USED
Girl Teen Stickers

STEP BY STEP


Choose photos, paper, card and embellishments
 Matt photos onto pink cardstock
Add a large gerbera
Decorate with stickers, flowers etc.
One pretty and easy layout to follow along with.
Thank you so much for visiting today. Don't forget to watch out for lots more inspiration from the rest of the team.
ALSO I WOULD LOVE IT IF YOU BECAME A FOLLOWER AND LEFT ME SOME ENCOURAGEMENT - MANY THANKS
BYE FOR NOW

Wednesday 16 March 2016

WORDS AND PAINTERY MARCH CHALLENGE


Hi everyone and welcome to my blog and my latest project.
I am trying to make cards and layouts so this is my card for the WORDS AND PAINTERY March challenge.
I love these colours. These colours are girly, sweet and bold.
  Hope you like my interpretation.
Pop back again on Saturday where I have a layout planned.
Bye for now
XXX

Monday 7 March 2016

CRAFTERS PALETTE MARCH EASTER CARD PROJECT

Hi everyone and welcome to my blog and the CRAFTERS PALETTE design team reveal for March. I am up on the blog today with an Easter card.
For this project I chose to use up my Kaisercraft Rustic Harmony Collection pieces. As the project is to be inspired by Easter, eggs, chicks and bunnies I wanted to make an Easter card.
 
PRODUCTS USED
Card Blank - 6x6 inches
Kaisercraft Rustic Harmony Collectables
Pink Bazill Cardstock
Assorted Buttons
Lace
Pearls
Felt for the hand made flowers
Doilies
Leafy Punch - Woodware
Brown ink
Mini birds nest with eggs from my stash
Bunny picture from the Internet.

 
I wanted to make some felt flowers for this project as they are so pretty and easy to make.
Using regular and pattern edged scissors, cut out some spiral circles in felt, roll up using a quilling tool and add hot glue.
Easy peasy and so pretty.
I hope you like my card and have a go at the felt flowers.
I hope you enjoyed my project, we would love to see your interpretations and ideas using felt and making an Easter card.
Also I would love it if you would become a follower to keep up with all my latest inspiration, many thanks in advance.
Bye For Now.


Saturday 5 March 2016

ROBINS NEST DESIGN TEAM REVEAL MARCH CARD FOR EASTER

Hi everyone Welcome to my blog and my latest project.
I have decided to do an Easter card, and have made this using a 12 x 12 sheet of pretty paper. Its called an envelope card. If you have never made one of these before, please follow along my step by step, it is super easy and really fun.
 
 
SUPPLIES USED
Teen Girl Stickers
Yellow cardstock
Pink cardstock
Title - He is Risen, from the Internet
Doily edge punch
Small butterfly punch
Scallop edge scissors.
STEP BY STEP

Choose paper 12 x 12

Fold in half, crease using a bone folder
Fold in half again, crease using a bone folder
Turn the paper over and start folding each section into the centre
Your paper should look like this
 
Now fold in half, with the flaps on the outside
Then bring the flap on the rear side to the front
You should have two flaps facing you
 Using a border punch, punch out two 1 inch strips of card
Glue them between the two flaps
Punch two more strips of card, adhere as per the picture
Adhere two quarter inch strips of card on the seam line
Take your piece of ribbon and glue to the front flap at the V
And do the same on the back
Adhere a large flower to the base of the V of the flap first
Decorate with more hand made flowers
To see how to make these click on the link below
Add some cut out bunnies from the bunny paper
Add some butterflies and dew drops
Add the title
 
Decorate the inside flaps in a similar way
Add some sticker flowers
Make a greeting card for inside
Tie up your ribbon to close.
 
LINK TO THE HAND MADE FLOWERS
See my Valentines card on the blog with a step by step for the flowers
 
THANK YOU SO MUCH FOR STOPPING BY TODAY
DO LOOK OUT FOR MORE INSPIRATION FROM ALL THE OTHER DESIGNERS AND I WOULD LOVE IT IF YOU WOULD STOP BY MY BLOG AND BECOME A FOLLOWER HERE http://theprettypaperpatisserie.blogspot.co.uk/
BYE FOR NOW.
XXX


Friday 4 March 2016

The Robins Nest Design Team Reveal Sneak Peak

 
Hi everyone here is a sneak peak of my upcoming project for Easter.
Bye for now! x