Saturday 28 March 2015

STUCK ON U SKETCHES DESIGN TEAM REVEAL - March 27th SKETCH CHALLENGE - SMILE FOR THE CAMERA


Hi everyone, welcome to my blog and the latest
STUCK ON U SKETCHES DESIGN TEAM REVEAL
This is a photo of my parents, my younger brother and I, on a day trip to London in the 1970s. We are feeding the birds in trafalgar square. Hope you like it and give this fab sketch a go.


Please scroll down for a step by step.
 

Step 1
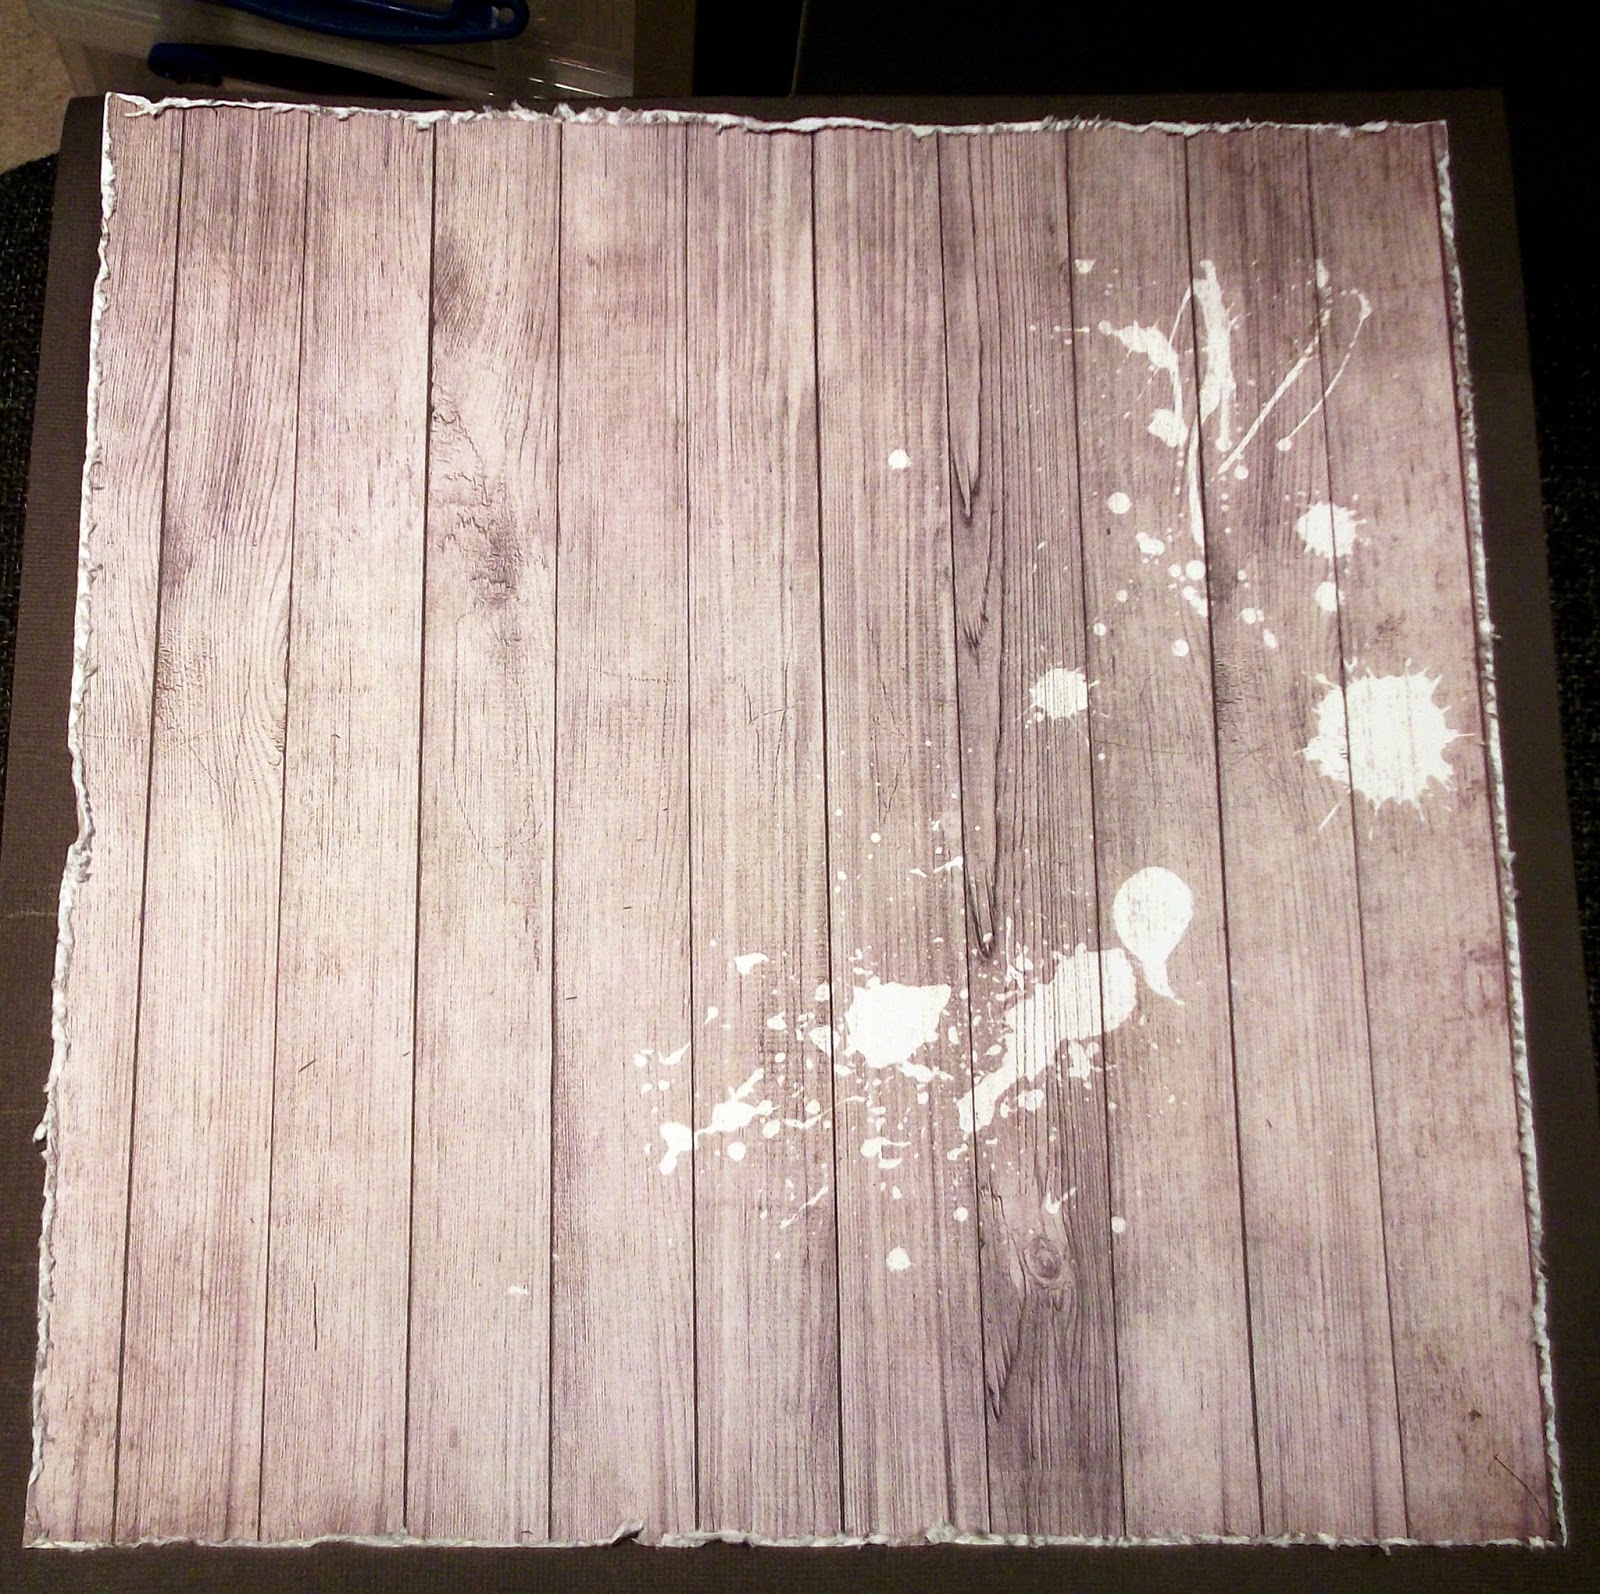
Choose some pretty paper and coordinating cardstock
Cut 1inch from the pretty paper and distress the edges
Attach to background cardstock (brown 12x12)
Step 2
 
Matt photo in cardstock and lightly adhere
Step 3
 
Cut out a sheet of pretty paper to 8x6 inches, distress the edges
Adhere as per the sketch
Step 4
 
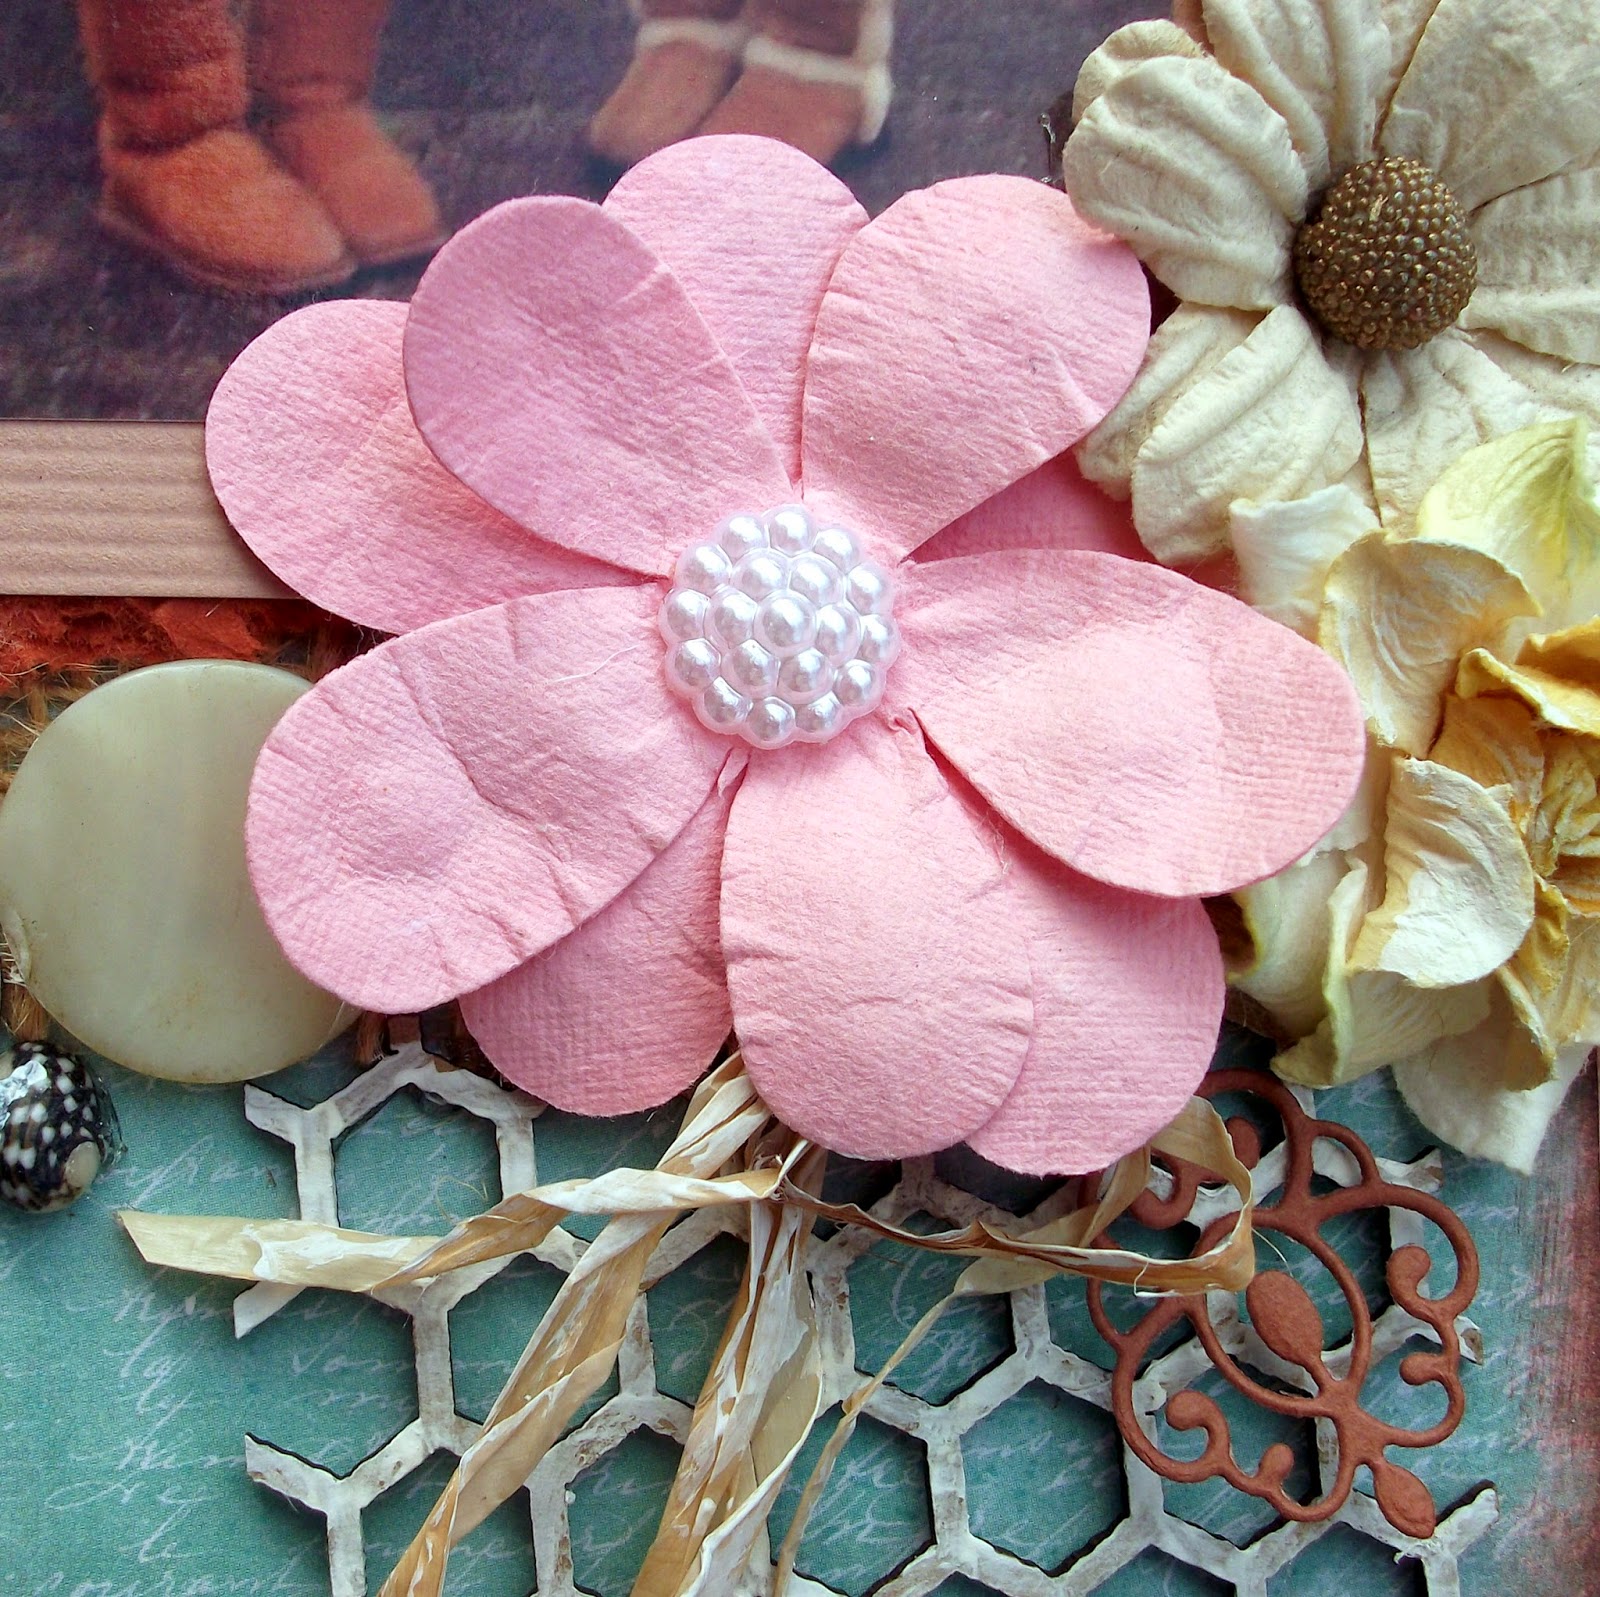
Start adding layers as per the sketch, distressing edges as you go
Add flowers and other embellishments 
Step 5
 
Add more layers and (corrugated card in pink)
Step 6
 
 Finish off by adding leaves, branches, butterflies, buttons, title sticker and some white paint spatters.

xxx
SCRAPPY STASH
Plain cardstock in brown, white and green
Pretty paper by 7Dots
Pink corrugated card
Sizzix leafy branch die
Lacy Leaf die
Other lace die
Zip die
Coloured buttons
Butterflies
Stick pins
Assorted flowers
White acrylic paint
Pink paper clip
Assorted sentiments - 7Dots papers.
I have also entered this into the latest challenge at 7Dots.
7 Dots studio
xxx


Thursday 19 March 2015

MY LATEST CARD USING CARDABILITIES SKETCH #119


Hi everyone and welcome to my blog and another card.
I used the latest sketch by CARDABILITIES sketch #119.


xxx
 

HERES HOW
Take a 6x6 inch card blank and cover with plain green cardstock
Adhere a pretty paper, cut to 5.5x5.5 inches, distress the edges
Add a small white, 4.5 inch doily to the centre
Add another die cut circle in green cardstock
Add another die cut circle in white cardstock
Take a strip of paper, punch the edges, add as per sketch
Start decorating with flowers
Add a butterfly, a beaded pin body, a small clock face
Add die cut branches
Die cut a journal block
Die cut the title
Add some pearly stamens.
I hope you like it and give it a go.
xxx
CRAFT STASH
White card blank (6x6inches)
Plain cardstock in green, light green, brown and white
White doily
Circle dies x 2
Journaling block
Title die cut (For you)
Doily Punch
Assorted flowers x 12
White pearly stamens x 6
Pink pearly stamen bunch
Butterfly
Stick pin
Clock face
Leafy die by sizzix.
xxx
LINKS
 
xxx 
MANY THANKS FOR VISITING TODAY
 
XXX


Tuesday 17 March 2015

THINKING OF YOU


Hi everyone and welcome to my blog and my latest card.
xxx
HERES HOW 
Attach a piece of 6x4 inch cardstock to the front of the card blank
Distress the edges of a slightly smaller piece of pretty paper using the edge of your scissors
Adhere this to the front of card
Add half a white lace doily to one side
Attach a small frame with hot glue as per the photo 
Adhere a large flower just below and to the left of the frame
Adhere a small bunch of flowers to the left side of the frame
Adhere a small bunch of flowers to the right of the frame
Tuck two leaves under the bunch of flowers 
Tuck pearly stamens behind both bunches of flowers
Add a stick pin
Fold over the twine, adhere as per the photo
Attach a stamped lacy journaling block
Add a pearl button and a swirl.
And there you have it, one pretty card.
 
CRAFTY STASH
One 6x4 inch card blank and envelope
One sheet of 6x4 inch pretty paper (Prima)
One sheet of 6x4 inch cardstock
Small photo (From Prima pad)
Hand made mini frame
White lacy doily die cut
One large flower
Eight smaller flowers
Two green leaves
One pearl stick pin
Pearl stamens x 6
Green twine
Pearl button
Lemon swirl
xxxxxxxxxx
If you would like to purchase the items to make this card, please go here http://www.ebay.co.uk/itm/201310339100?ssPageName=STRK:MESELX:IT&_trksid=p3984.m1555.l2649


Saturday 14 March 2015

STUCK ON U SKETCHES DESIGN TEAM REVEAL - March 13th - Awesome


Hi everyone and welcome to my blog and the latest sketch challenge from STUCK ON U SKETCHES
This is a great sketch for multiple photos, so why not give it a go?
Follow along with my How To if you would like.

xxx
HERES HOW
Choose photos, papers and embellishments
Take a pretty paper, cut down to 11x11 inches, distress the edges
Attach to a 12x12 piece of cardstock
Matt photos in co-ordinating card
Lightly adhere to your page as per the sketch
Start to layer up by adding torn corrugated card,  torn mulberry card, hessian in two colours and lace
Now adhere photos with foam pads
Start to decorate with flowers, leaves, chipboard, raffia, etc
Paint the chipboard white.
xxx
SCRAPPY STASH
Plain cardstock in three colours
Pretty paper from 7DotsStudio
Corrugated card - navy
Mulberry card - orange
Brown chalk ink
Foam pads
Assorted flowers
Mini shells - picked up at the beach
Pearl buttons
Mother of pearl buttons
Mini clock face
Cream lace
Hessian flowers
Pearl stamens
Clock face
Lacy leaves
Prima velvet leaves
Chipboard honeycomb
Chipboard title
Hot glue gun for the flowers, hessian and chipboard
White acrylic paint
xxx 
SOME CLOSE-UPS


LINKS
Five steps to the perfect layout
 
Clock faces
xxx
MANY THANKS FOR VISITING TODAY
I WOULD LOVE IT IF YOU BECAME A FOLLOWER AND LEFT ME SOME COMMENTS
BYE FOR NOW
xxx


Monday 2 March 2015

BERRY71BLEU MARCH MOOD BOARD CHALLENGE - FLOWERS GALORE - The Power of Love


Hi everyone and Welcome to my blog and the
BERRY71BLEU March  Mood Board Challenge.
Todays Mood Board Challenge is for a project using FLOWERS GALORE!
As you know I struggle to make a layout without them!
I hope you like this challenge and have a go.

Please feel free to create any project with flowers. It could be home décor, art journal page, layout, altered art or anything - but please make sure its flowery! 

HERES HOW
Choose all  papers, cardstock and embellishments
Cut down a sheet of pretty paper to 11 x 11 inches
Adhere onto plain cardstock
Tear a few centimetres out on two sides
Glue lace underneath these tears
Matt photo onto co-ordinating cardstock, lightly adhere to page
Cut out some panels from the pretty papers, matt and adhere as per the layout
Cut a 1 inch strip of pretty paper for a border, ink the edges, adhere
Attach some lace underneath this strip
Start to decorate with chipboard (I painted mine with pearl paint)
Add some stickers and lacy die cuts
Now add all the flowers, pearl centres and leaves
I painted my flowers with pearl paint to give them some glimmer.

SCRAPPY STASH
Plain cardstock in peach, pale lemon and pale green
Pretty papers and stickers - Thoughts Keeper 7 DOTS STUDIO
Chipboard  including the title piece by SCRAPINIEC
Brown chalk ink
Lace in cream
Leaf die - Classic leaf die by Heartfelt Creations
Lacy leaf die - H.Creations
Lace die - H. Creations
Assorted flowers
Pink and lemon pearlized paint
Pearl buttons
Clear sparkly button.
SOME CLOSE UPS


And now for our Sponsors and the Prizes

Our sponsors have provided prizes with international shipping included! Yay!!

1st Prize:
Set of chipboard from Scrapiniec


Random Prize:
Set of products from 7 Dots Studio


Sponsors:


Scrapiniec is Polands biggest and oldest chipboard manufacturer. They produce chipboard pieces in a large variety of sizes and designs in Polish, English and even Russian language. Scrapiniec ships worldwide and also fulfils  individual orders.


We are a team of creative women who cannot image their world without paper, glue and the creative process. Scrapbooking is our passion and we love to share our passion with other scrapbookers. For this reason, 7 Dots Studio exists. The quality of our products is our top priority. Our lines consist of papers, stickers, die-cut elements, clear stamps, stencils and chipboard pieces. You can find our products in scrapbooking stores around the world.


MANY THANKS FOR VISITING ME TODAY
I REALLY APPRECIATE YOUR COMMENTS
HAPPY SCRAPPING
BYE FOR NOW
XXX