Tuesday 29 September 2015

SHAPED CARD


Hi everyone and welcome to my blog and my latest card.
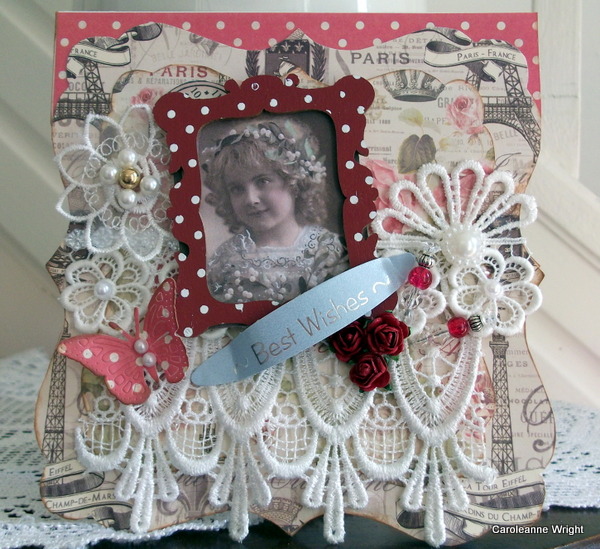
I have made another shaped card for your inspiration.
I used a template and pretty papers from Dovecraft called Sweet Paris.
I have entered this into the September challenge at Noor Design here http://noordesign-uk.blogspot.nl/2015/09/challenge-10-shaped-cards.html?m=1
HERES HOW
Cut out the scalloped shape in pretty paper and adhere to a 5.5x5.5 inch card
Cut around the card so its the same shape
Ink the edges
Cut out another layer, slightly smaller, ink the edges and adhere
With hot glue, attach two layers of pretty lace across the centre of the card
Take a matching frame, add a mini photo and adhere to the centre of the card. I used foam pads to the top part only to give the frame some lift as the lace is quite bulky
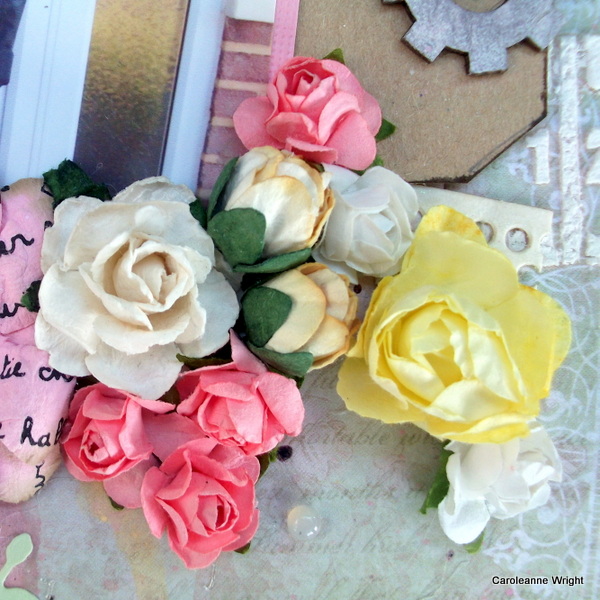
Add some lace flowers either side of the frame
Add three mini roses
Add two handmade stick pins
Die cut a butterfly in coordinating paper
Add the title.
STASH USED
White cardstock for the base card
Pretty papers Dovecaft, Sweet Paris Designer Pack 8x8 inches
Brown chalk ink
Assorted lace pieces
Assorted lace flowers
Mini roses
Hand made stick pins
Butterfly die
Mini sticky back pearls
Scalloped template from Noor Designs
Title from a pack in  Poundland.
I hope you like it.
LINKS
Click on the links below if you would like to use some butterflies, make flowers and stick pins.
Butterflies
MANY THANKS FOR VISITIN TODAY
BYE FOR NOW.

Monday 28 September 2015

SCRAP OUR STASH DESIGN TEAM REVEAL #30 - September 15th - Back To School


SCRAP OUR STASH

Hi everyone and welcome to my blog and the latest challenge from Scrap Our Stash.
For this challenge you can use the above sketch and use at least three different school supplies. Great for September!
For my supplies I used:
Paper clips, Rulers, Lined paper, Pencils and Books. 
HERE IS HOW I DID THIS
Choose photos, backing card stock, pretty papers and embellies
Matt photos onto card stock
Cut down the Kraft card to 11.5 x 11.5 inches, ink the edges
Attach Kraft card to 12x12 inch white card stock
Take pretty papers, cut to size as per the sketch and ink the edges
Matt some lined paper
Now adhere to the backing card as per the sketch design
Add photos
Now start to decorate
Adhere a small ruler to top right hand corner
Add long ruler as a border down right side
Attach paper clips
Die cut some pencils, adhere
Die cut the title, adhere
Ink around a small envelope, adhere as per the sketch
Ink around a mini frame and attach over the title
Using hot glue attach some flowers
Add journaling.
SCRAPPY STASH
Plain cardstock: Kraft, white and brown card
Pretty book papers from my stash
Lined paper from my stash
Brown ink
Paper clips
Mini frame by Dovecraft
Title die cut using Sizzix Sizzlits school dies set
Pencil die cuts Sizzix Sizzlits school dies set
Rulers from my stash (very old, not sure where from)
Assorted flowers
Hot glue gun.
 
PRIZES
And....this is the prize Scrap Our Stash is awarding our randomly 
drawn winner this month:
So make sure you get your entries linked up on our side bar by
September 29th, 11:59 PM (PST
- See more at: http://scrapourstash.blogspot.co.uk/#sthash.2OdvgNFK.dpuf


Wednesday 23 September 2015

BERRY71BLEU DESIGN TEAM REVEAL SEPTEMBER MOOD BOARD - FOREST - Beautiful


Hi everyone and welcome to my blog and the Berry71Bleu
Design Team Reveal September Mood Board - FOREST.
It really is the beginning of Autumn and I knew I had just the photos for this challenge. These were taken a few years ago of Jessie in the copse opposite our house. Its just beautiful in there, hence my title.  I hope you like it and give this challenge a go.
Scroll down for How To,  Stash Used and the Prizes available.
 
FOREST
 
 
I have also entered this into the September challenge at  http://7dotsstudio.com/archives/20856 as I have used 7 dots papers and have framed my photo with flowers.
 
HOW I DID THIS
Choose photo and matt onto brown cardstock
Choose papers and embellishments
 Apply some gesso to the centre of the paper
When dry, take a leaves mask and some green paste
Apply this to the top left corner
Lightly speckle the page with paint in green, brown and black
When dry lightly adhere photo
Take two chipboards (leafy) add gesso, white paint and green paint  When dry, ink with script stamp using brown ink
Adhere to top right and bottom left corners of the photo
Cut out a cardboard tag, paint and adhere under photo
Add a couple more tags around the photo
Lightly stamp around the design with script stamp
Now start to decorate with assorted flowers and embellishments
Add the title.
SCRAPPY STASH
Pretty paper by 7Dots Studio - Songbird/Nature Walk
Brown card stock
Brown ink - Tim Holtz
Paint - Daubers in white, green and brown
Green texture paste - Shimmerz Paints
White gesso
Corrugated tag - hand cut
Leafy swirl chipboards - my stash
Other tags - Heartfelt Creations
Script stamp - Prima
Butterflies
Metal Butterflies
Buttons from my button box
Assorted flowers from Prima, my stash and hand made
Butterfly pins - hand made
Leaves - my stash
Title - Blue Fern Studios.
CLOSE UPS


xxx

PRIZES
1st prize:
Lost and Found collection sponsored by 7 Dots Studio 
(as shown below)
Random Prize:
Set of TandiArt prints and cards


Our sponsors provide prizes with international shipping included!


OUR SPONSORS


We are a team of creative women who cannot image their world without paper, glue and the creative process. Scrapbooking is our passion and we love to share our passion with other scrapbookers. For this reason, 7 Dots Studio exists. The quality of our products is our top priority. Our lines consist of papers, stickers, die-cut elements, clear stamps, stencils and chipboard pieces. You can find our products in scrapbooking stores around the world.
 
 
TandiArt


Many thanks for visiting today, don't forget to visit all the other designers for more inspiration.
HAPPY SCRAPPING.


Monday 21 September 2015

CARDABILITIES #131 Just A Note

 
Hi everyone and Welcome to my blog and my latest card.
I have used a sketch from CARDABILITIES for my  inspiration.

XXX
HERES HOW I DID THIS
Take a 6 x 6 inch card blank and adhere pretty paper
Start die cutting a circle, an oval and a swirly doily
Cut the oval twice, once in card stock and once in pretty paper
Adhere the swirly doily first
Adhere the oval 
Adhere the oval centre
Using foam pads, adhere the circle
Die cut some leafy branches, add these
Die cut a border, attach under the circle
Decorate with flowers, butterflies and stamens
Add the title.
XXX
STASH USED
Card blank - 6 x 6 inches
Pearlised cardstock
Pretty papers - Sweet Paris, Dovecraft
Doily die - Heartfelt Creations
Oval die - Spellbinders
Circle die - Spellbinders
Tape measure die
Leafy branches - Sizzix Sizzlits
Mini butterflies
Pearls
Pearly Stamens
Large flower - Prima
Mini flowers - Wild Orchid Crafts
Title - Creative Expressions, Sue Wilson.
XXX
 
SEE YOU BACK HERE ON WEDNESDAY FOR THE BERRY71BLEU DESIGN TEAM REVEAL
THANK YOU FOR VISITING TODAY


Friday 18 September 2015

MY LATEST CARD USING A CHALLENGE AT NOOR DESIGN

 
Hi everyone, welcome to my blog and my latest card.
I used a challenge over at NOOR DESIGN for this one. The challenge is to make a shaped card.
HERES HOW
Using a template cut out a large scalloped card, ink the edges
Attach to the front of a 8 x 8 card
Cut out three layers of coordinating pretty papers, distress the edges
Attach to card front
Die cut a border for the centre of the card and adhere
Die cut a frame, adhere
Attach a small chipboard frame with photo using a glue gun
Die cut three swirls and add in between the layers
Start to decorate using flowers, butterfly, stamens, brooch, button and a stick pin
Add a pearl flower trim.
CRAFTY STASH
Card blank 8 x 8
Pretty papers - Sweet Paris by Dovecraft 8 x 8 pad
Plastic template
Brown ink
Frame - Sweet Paris
Dies all Heartfelt Creations
Butterfly
Pearl pins handmade
Metal brooch embellishment
Stamens
Assorted mini roses
Mini heart button.
LINKS
Butterflies to cut out yourself
Pearl pins how to make
Mini flowers how to make
Pearl flower trim to buy here
bye for now 
MANY THANKS

Monday 14 September 2015

SCRAP OUR STASH DESIGN TEAM SEPTEMBER REVEAL - LUNCH - STASH CHALLENGE #30, 1st -30th Sepember

 
Hi everyone and welcome to my blog and the
September challenge #30. This time we have combined our STASH challenge with a sketch over at STUCK? SKETCHES
which is optional.
So please feel free to use the sketch below, along with the word
L-A-Y-E-R-S
Scroll down to see how I did this, a list of stash used and the prizes.
 
L - Leaf
A - Arrow
Y - Yarn
E - Enamel brooch
R - Roses
S - Spoon
 
HOW I DID THIS
Matt three photos onto card stock
I chose to use part pretty paper, part card stock
Cut pretty paper to 12x8 inches and card just slightly bigger than 12x4 inches, glue together
Add a 12 x 2 inch strip border
Add a scalloped strip in card stock
Now add the matted photos
Start to decorate
I chose a blue doily for the circle and a die cut circle on top
I added a small border of embellies
I cut out a circle into the blue cardstock and added embellies and some journaling
Finally add the title and pearls and any extras.
SCRAPPY STASH
Dark blue cardstock
Pretty paper by Blue Fern Studios
 Title Alphas - Sizzix
Pale blue doily
Layered Elegant Swirl die by Heartfelt Creations
Resin butterfly by Prima
Arrow die
Metal embellishments from my stash
Assorted flowers
Mini pearls
Two enamel brooches from The Works
White fluffy yarn.
PRIZES
To participate in the challenge you are not required to use the sketch, but if you
decide to use the sketch, make sure you link it up with Stuck?! 
to be entered into their prize drawing.
STUCK click on the link!
And here is a look at the prize Scrap Our Stash is awarding our
random drawn winner this month:
$20 gift certificate to shop at 
BYE FOR NOW.


Thursday 10 September 2015

Jessies First Day of University

 
Hi lovely scrappers and welcome to my blog.
Today I have made a layout using the

HERES HOW
Choose background paper, photos and embellies
Matt photos
Take a border stencil and some texture paste and paste a border across the centre of the page. (Barely seen).
Take strips of co-ordinating papers and adhere across the page as per the sketch
Speckle the page with paint
Add some drippy paint
When dry adhere the matted photos
Add a doily, tags, envelope, mini cogs and strips of paper
Decorate with flowers and leaves
Add a few enamel dots 
Add the title.
 
XXX
SCRAPPY STASH
Pretty paper - Heartfelt Creations
Various paints from my stash
Prima sprays
Ruler stencil
White texture paste
Plain cardstock - peach and pale green
Assorted flowers
Mini cogs die by Sizzix
Tags from The Works
Brown envelope - The Works
Cream paper with holes from my stash
Leafy branch die from Sizzix Sizzlits
Enamel dots
Mini frame by Dovecraft
Journaling block just seen - Websters pages
Fuzzy alphas for the title.


XXX
MANY THANKS
BYE FOR NOW


Friday 4 September 2015

CARDABILITIES #130


For the Cardabilities latest sketch challenge, click on the link above.
I have made this for a new home card so I pleated the paper to look like curtains!
HERE IS HOW I DID MINE
 
Cover a 6x6 inch card blank with black card
Add a slightly smaller piece of pretty paper
Take a piece of paper 6.5 x 12 inches and spritz with water or ink
Scrunch into pleats until it fits two thirds of the card, trim to fit
Dry with heat gun and adhere with hot glue
Punch a black border strip and adhere down the edge of the pleats
Add two more thin border strips down the edge of the pleats
Cut a black circle and adhere as per the sketch
Punch another border strip and add this to your circle
Start to decorate with assorted flowers, leaves and a key
Add the sentiment.
CARD STASH USED
One 6x6 inch card blank
Black, soft green and pink card stock
Pretty paper by Heartfelt Creations Romantique Collection
Prima spritzer
Sizzix sizzlits Leafy branch die
Martha Stewart border punches x 2
Small chipboard key from my stash (painted white)
Two large Prima flowers
Mini roses x 6
Flat flowers x 3
Small pearls x 3.
And there you have it, I hope you give it a go.
xxx
Here are some links to make your own version.
Pretty Papers
xxx
Many thanks for visiting today.