
How are you this beautiful Wednesday! Exciting news, the Holiday Star Collection just launched for everyone! Creating Christmas cards is made EZ with the Holiday Star Collection! Keep it simple, for those quick and easy cards, or create layered iconic star studded cards for those one of a kind handcrafted projects. Whether you’re wanting to create an iconic frosty star studded card, or feature heartwarming messages with exquisite detail and design, you can create this and so much more!
Special Savings: The Holiday Star I Want It All has a 10% discount, only available until July 16th, 2022 or while supplies last! Your new collection will arrive packaged in a transparent zipper bag with hot pink trim, great for keeping organized!


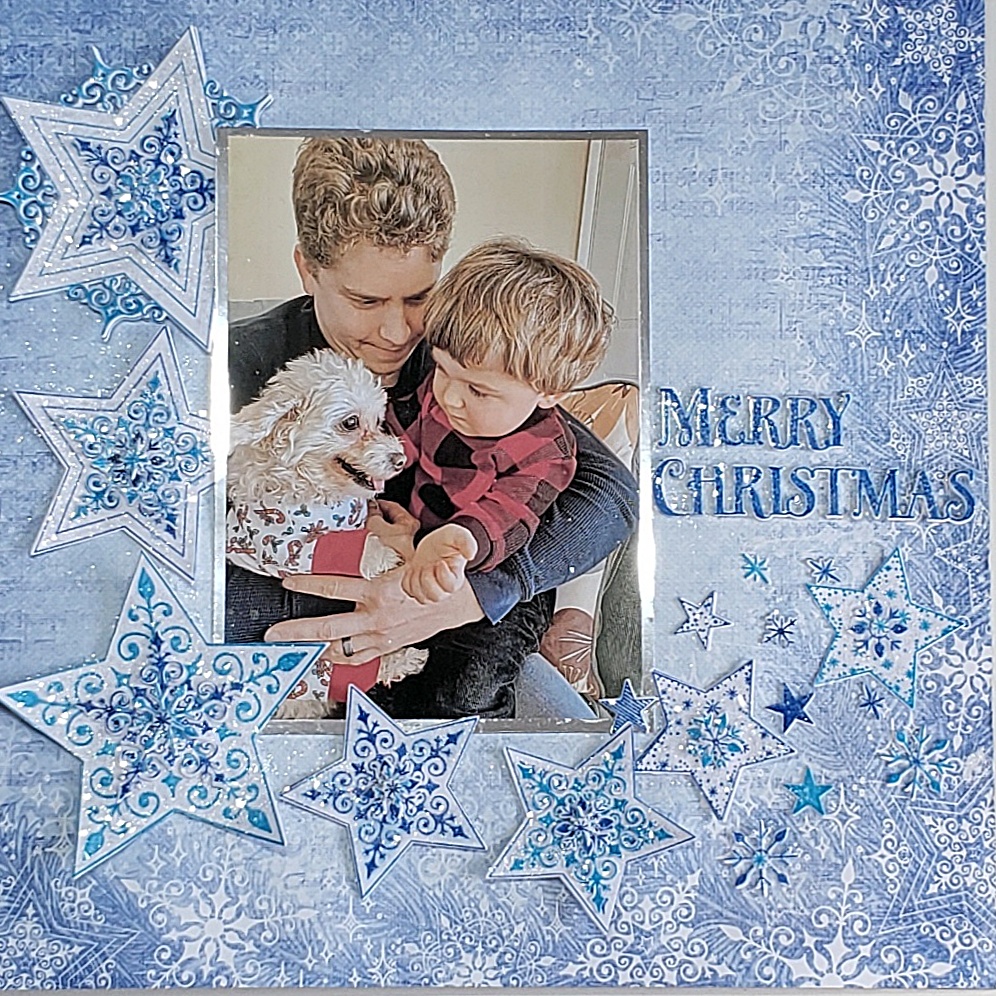
Matt a 5 x 7-inch photo onto Luxe Silver card cut to 5 ¼ x
7 ¼, adhere to sheet 5A from the Holiday Star Collection Paper Pad.
Die cut the Starry Holiday Greetings die - Merry Christmas, in Silver Luxe card, twice. Glue together. Stamp Merry Christmas in Memento Danube Blue ink onto Flower Shaping paper, die cut with the Merry Christmas die, adhere with Dries Clear Glue onto the silver greetings die cuts.
To make the stars, use white card or Deluxe Flower Making Card.
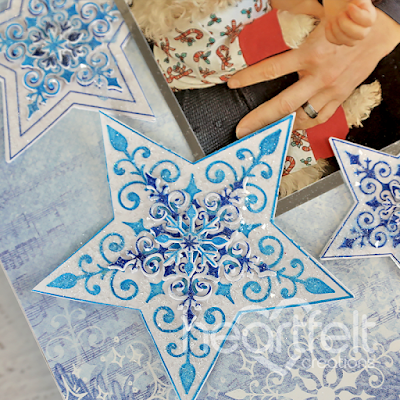
Star 1 - Stamp the Holiday Star in Paradise Teal ink. Die cut the outside edge with the matching die. Stamp again in Danube Blue ink. Die cut the inner snowflake. Stamp in Paradise Teal ink the small snowflakes and the small stars from the Large Holiday Star Cling Stamp set. Stamp again in Danube Blue ink. Die cut with the matching dies. Adhere the blue snowflake to the Holiday Star followed by the small teal snowflake followed by a tiny blue snowflake. Adhere slightly underneath the photo.
Star 2 - Stamp the Holiday Star in Memento Danube Blue ink. Die cut the inner star with the matching die. Stamp again in Paradise Teal ink. Die cut the snowflake with the snowflake die and adhere to the blue star. Stamp the mini snowflakes in Danube Blue ink. Die cut with the matching die. Adhere the teal snowflake followed by the mini blue snowflake, followed by a tiny teal snowflake onto the Blue star. Adhere slightly underneath the photo.
Star 3 - From the Large Holiday Star Stamp Set, stamp the Large Holiday Star, the smaller stars and the mini snowflakes in Paradise Teal ink. Die cut the Large Holiday Star outside edge with the matching die. Cut off all the fancy outside edges so that you have a star shape. Stamp the Holiday Star in Danube Blue ink, die cut the snowflake with the matching snowflake die. Adhere the center blue snowflake to the teal star. Adhere a small teal snowflake. Adhere a tiny blue snowflake.
Star 4 - Stamp the Holiday Star in Danube Blue ink. Die cut the inner star with the snowflake with the matching star die. Adhere a blue snowflake to the center. Adhere a small snowflake and a tiny blue snowflake. Adhere to page.
Star 5 - Stamp in Danube Blue ink the Holiday Star. Repeat in Paradise Teal ink. Die cut the blue center star with the matching die. Die cut the inner snowflake from the Teal Holiday Star. Adhere the teal snowflake to the blue star. Adhere a small blue snowflake then a tiny teal snowflake and a tiny blue snowflake. Adhere to page.
Star 6 - Stamp the star set from the Large Holiday Set, in Danube Blue ink. Die cut with the matching die. Adhere a small teal snowflake followed by a mini blue snowflake. Adhere to page.
Star 7- Repeat as for Star 6 using Paradise Teal ink. Adhere a small blue snowflake followed by a tiny teal snowflake
Adhere a few small stars and snowflakes in the gaps. Using Dries Clear Glue and a small sponge, add glue all over the stars. Add clear glitter. So the same with the Merry Christmas Greeting. All done.
Holiday Star Cling Stamp Set, HCPC-3993
Holiday Star Die, HCD1-7411
Large Holiday Star Cling Stamp Set, HCPC-3994
Large Holiday Star Die, HCD1-7412
Starry Holiday Greetings Cling Stamp Set, HCPC-3995
Starry Holiday Greetings Die, HCD1-7413
Luxe Silver Cardstock, HCGP1-493
Deluxe Flower Shaping Paper Pack of 50 - White, HCPP1-475
Designer Dries Clear Adhesive, 159723
Ranger Archival Ink Pad - Paradise Teal, RACP500
Memento Dye Ink Pad - Danube Blue, TSMP600
OTHER PRODUCTS
Clear Glitter, Die Cutting Machine

No comments:
Post a Comment
Many thanks for stopping by my blog. I really appreciate and love reading all your comments. Have a great day, Bye For Now.