Friday, 31 January 2014

STUCK ON U SKETCHES DESIGN TEAM REVEAL - HAPPINESS


Hi ladies, welcome to my blog and the STUCK ON U SKETCHES DESIGN TEAM REVEAL
http://stuckonusketches.blogspot.co.uk/
 Do go visit SOUS and check out the sketch as they have some great prizes to win.

HERES HOW
Rip around a piece of pink cardstock and adhere to a pretty background paper.
Matt  photos in a soft grey card.
Take a script stencil/mask and some texture paste and add to layout in two places. Allow to dry.
Add photos.
Add layers using white doilies and music book paper, ink the edges.
Adhere to layout.
Start to decorate with flowers, butterflies, swirl and branches.
Add title and a journaling block.
SCRAPPY STASH
Pretty background paper
Plain cardstock
Music book paper
White doily
Homemade texture paste http://theprettypaperpatisserie.blogspot.co.uk/2013/04/homemade-texture-past.html
Prima script mask
Tim Holtz swirl die using corrugated cardboard
Sixxix sizzlits branch die
Butterflies http://www.pinterest.com/caroleanne345/butterflies/
Beaded pins http://theprettypaperpatisserie.blogspot.co.uk/2012/06/hand-made-stick-pins.html
Assorted flowers
Hand made flowers http://theprettypaperpatisserie.blogspot.co.uk/2013/03/hand-made-flowers-tutorial.html
Journaling tag
Fuzzy fibres in white
Brown chalk ink.
MANY THANKS FOR VISITING MY BLOG AND LEAVING ME LOVELY COMMENTS.
PLEASE COME BACK AGAIN SOON.
BYE FOR NOW.

Saturday, 25 January 2014

GOOD VIBES


Hi everyone, its the week end at last, hope you have lots of scrappy time.
Today I have made a layout using a Cest Magnifique Sketch for January for my inspiration.
http://cestmagnifiquekits.blogspot.co.uk/p/blog-page_10.html

For this one I used my Cest Magnifique January Kit.
HERES HOW
Choose a plain piece of backing cardstock.
Tear around an 11x11 inch piece of cardstock, adhere.
Tear a piece of pretty paper down to 10x10 inches, adhere.
Double matt your photo and distress the edges, adhere.
Add some distressed layers.
Start to decorate.
Add the title.
Add some inking.
SCRAPPY STASH
Cest Magnifique January kit papers
Pink cardstock
Grey cardstock
Black ink
Music stamp - Prima
Doily punch - Martha Stewart
White doily
Clock faces http://www.pinterest.com/caroleanne345/clocks/
Butterflies http://www.pinterest.com/caroleanne345/butterflies/
Beaded Pins http://theprettypaperpatisserie.blogspot.co.uk/2012/06/hand-made-stick-pins.html
Sticky back pearls
Assorted flowers
Hand made flowers http://theprettypaperpatisserie.blogspot.co.uk/2013/03/hand-made-flowers-tutorial.html
I hope you like my layout. Thank you for visiting my blog and leaving me lovely comments.
Bye for now.

Friday, 17 January 2014

STUCK ON U SKETCHES REVEAL AND GIVEAWAY WINNER


Morning all and welcome to my STUCK ON U SKETCHES DESIGN TEAM REVEAL  (Scroll down for my giveaway winner)
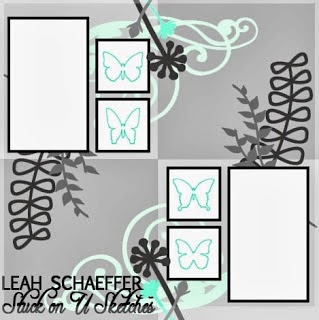
If you love sketches then you will love this one by our lovely Leah.

Plus we will be having some incredible
MONTHLY SPONSORS,
 sharing some delicious
 Blog Candy with you!
 
All you need to do is join
 ANY challenge during
 the month to have your
 name put in
 (Sketch, Die-Cut or Project Life)
Winners will be announced
 on the first
 Friday Challenge of the following month.
 
http://stuckonusketches.blogspot.co.uk/

INSTRUCTIONS
I have kept this one quite simple today and monochromatic.
Matt photos onto cardstock
Cut out the backing scroll shaped cardstock using a template
Adhere matted photos to a piece of cardstock 6x8.5 inches
Matt this onto a piece of cardstock 6.5x9 inches
Adhere to the shaped card
Add a border 2 inches wide
Punch out a 2 inch border (I used a Martha Stewart shell punch)
Attach borders
Add a piece of lace to the border
Start to embellish with assorted flowers, butterflies, shells etc.
SCRAPPY STASH
Plain cardstock
White lace
Border punch
Assorted flowers
Sticky backed pearls
Shell punch
Brown chalk ink
Scroll style template
 
MY GIVEAWAY WINNER FROM LAST FRIDAY 10TH JAN
 
 
CONGRATULATIONS TO ROSIE
Rosie, please send me your address to pac.wright@ntlworld.com
 
MANY THANKS FOR VISITING MY BLOG TODAY, LEAVING ME LOVELY COMMENTS AND BECOMING ONE OF MY LOVELY FOLLOWERS
BYE FOR NOW


Wednesday, 15 January 2014

FLOWER GIRL and PRIMA GIVEAWAY REMINDER


Hi everyone, here is my latest layout, using the Scrap Around The World mood board for my inspiration.
SCRAP AROUND THE WORLD
http://www.scraparoundtheworld.blogspot.com.au/2014/01/january-2014-challenge-9-soft-beachy.html
I love this mood board as it covers all my favourite pastel colours.
The pretty tea cups reminded me of this photo of Jess that I have been meaning to scrap for ages, the face painted flowers mimic the flowery cups and saucers.
I have added clear glass hanging jewels to represent the glass baubles from the board.
The swirls are to represent the sparkly hanging lights and of course I have added lots of flowery clusters.


I have also used the sketch at Once Upon A Sketch for inspiration.
 
My journaling for this sketch is both represented by the journaling words that I have masked on with texture paste and have also written down on a small journaling block that is hidden to the right side of the photo underneath the baubles and flowers.
The journaling reads;
The lessons here are that although Jess is nearly 17 years old she is still a child at heart who still loves having her face painted. She is still a girly- girl who giggled all the way through! She still loves doing things with Dad and Mum and she will always be my baby Jess. Never stop the child within!!
HOW I DID THIS
Take a pretty paper, mask and texture paste and add to one side.
Matt  photo and distress the edges of three different layers of matts.
Adhere.
Add more layers, doily, music paper etc.
Cover photo and use spray mist to highlight the music paper.
Decorate with assorted flowers, swirls, butterflies, baubles, string beads etc.
SCRAPPY STASH
Pretty papers
Prima script mask
Music papers
Pearl string
Blingy swirls
Assorted flowers
Butterflies
Sticker alphabets
White doily
GIVEAWAY REMINDER
Don't forget you have until Friday to enter my
Prima Stamps Giveaway. Just scroll down till you get there.
Thank you so much for visiting my blog and leaving me kind comments and following me. I really appreciate it.
Happy Scrapping.


Sunday, 12 January 2014

SMILE AND BE HAPPY with how to BUILD A PAGE


Hi everyone and welcome to my blog.
Today I have a BUILD A PAGE for you so you can see how to put this page together.
I have used COLOR STORIES INSPIRATION #104 for my inspiration.
This one was a real challenge for me that's why I decided to do it as there is no way I would normally use all these bright colours together!
http://csicolorstoriesinspiration.ning.com/
and Sketchabilities #106 for my design - http://sketchabilities.blogspot.co.uk/
AND HERE IS HOW
STEP 1
I forgot to take the first couple of photos but this is what I did.
Take a sheet of white cardstock and paint all over with Gesso. When dry take a mask and some texture paste and mask all over the card.

 STEP 2
When dry, take some mists and mist all over the page then use a sponge or kitchen towel to  blend out the edges. I also used some blue paint around the edge. When dry rip the page down a little.
Adhere to a 12x12 sheet of white card.
 STEP 3
Take some corrugated cardboard and paint it using white paint then rip around the edges to the required size.
 STEP 4
When dry, add a couple of ripped borders of corrugated card.
 STEP 5
Add matted photo
STEP 6
Start adding layers.

 STEP 7
Add two borders of lace top and bottom.
 STEP 8
Add title.
STEP 9
Decorate with flowers and embellies.


STEP 10
Don't forget the journaling. I made a couple of changes at the end with the lace border at the top and adding a little black bird. And I added some doodling to the top and bottom of page as per sketch.
 
SCRAPPY STASH
White cardstock, Gesso, White paint, Various mists, Corrugated cardboard, Damask pink paper from C.S.I Co ordinates, Sizzix caged bird die, assorted flowers, title and frame - C.S.I Co ordinates,
Clock face -http://www.pinterest.com/caroleanne345/clocks/
Mist and mask from my Cest Magnifique Mixed Media Kit here http://cestmagnifiquekits.blogspot.co.uk/p/blog-page_10.html
Martha Stewart doily punch, pink roses lace strip, black pen, hot glue gun, foam pads, mask, texture paste - http://theprettypaperpatisserie.blogspot.co.uk/2013/04/homemade-texture-past.html
This is how I solved the case,
THE SCHEME - I used all 5 colours.
EVIDENCE      - I used crowns - in the photo, damask paper, lace roses, paper lace border, paint for the background, cardboard and birds.
TESTIMONY    - I framed the title and added a C.S.I journaling block with the 5 Ws -
 WHO WHAT WHEN WHERE WHY.
 
HOPE YOU LIKE IT AND GIVE IT A GO.
THANK YOU FOR VISITING MY BLOG AND LEAVING ME YOUR KIND COMMENTS
AND DONT FORGET I AM HAVING A GIVEAWAY THIS WEEK, JUST SCROLL DOWN FOR THE INFORMATION
I WILL PICK A WINNER NEXT FRIDAY
BYE FOR NOW.

Friday, 10 January 2014

MY NEW DESIGN TEAM REVEAL AND GIVEAWAY - CHERISH THIS MEMORIES FOR LIFE - BAILEY

-


http://cherishchallenge.blogspot.co.uk/2014/01/utfordring-5-cherish-this-memories-for.html
WOW -  I AM SO THRILLED TO TELL YOU MY NEWS,
 I HAVE JOINED
CHERISH THIS -  MEMORIES FOR LIFE DESIGN TEAM!
Here is my first sketch  for CHERISH THIS.
This one is by BRIT SVIGGUM whom many of you know. 
I love this sketch, do give it a go, they have fab prizes to give away.
As do I! For my first sketch I thought it would be great to have some  Blog Candy for my followers to win.
To be in with a chance, please follow me, leave me a comment to let me know, and I will put you in a draw to win some scrappy stash. I have used some Prima stamps on this layout so I thought I would have 3 new PRIMA STAMPS to give away.  
I shall draw the winner next week.


HERE IS HOW I DID THIS
Choose pretty papers and co-ordinating cardstock and matt your photos.
Take a mask and some modelling paste, mask the bottom left hand corner, I chose a script mask.
Next use some paint and doodle over  this area. I used a splat mask for this.
Add some stamping over the background in brown ink.
Add some circle stamping in white paint, I used the end of a wine cork! (Although it did get covered up at the end).
Paint some chicken-wire chipboard in white, adhere to either side of where your photos will go.
Adhere photos using foam pads at the non chicken-wire end.
Start to decorate with various embellishments.
Add a title.
SCRAPPY STASH
Pretty paper by Maja
Plain cardstock
Assorted flowers
Swirl - Sizzix
Chicken wire - Blue Fern Studios http://www.bluefernstudios.com/
White paint
Homemade modelling paste recipe here http://theprettypaperpatisserie.blogspot.co.uk/2013/04/homemade-texture-past.html
Blue metallic paint
Brown chalk ink
Title stickers
Sticky back pearls
Script background mask by Prima
Splats background mask by Prima
Clock faces here http://www.pinterest.com/caroleanne345/clocks/
Script stamp - Prima
Music stamp - Prima
I also used the Mood Board over at Inkido for some inspiration.
http://inkido.blogspot.co.uk/

MANY THANKS FOR VISITING MY BLOG AND LEAVING ME LOVELY COMMENTS,
I REALLY APPRECIATE THEM. ALSO THANK YOU FOR FOLLOWING ME.
BYE FOR NOW.

Thursday, 9 January 2014

PRIMA GIVEAWAY REMINDER and CARD


HI EVERYONE, I AM HAVING A BLOG CANDY GIVEAWAY TOMORROW ON MY BLOG ALSO SOME NEWS. 
TO BE IN WITH A CHANCE TO WIN, FOLLOW ME, LEAVE ME A COMMENT TO LET ME KNOW AND YOU COULD WIN SOME PRIMA STASH.
 
Also here is a card I have made for a challenge over at CARDABILITIES.
http://cardabilities.blogspot.co.uk/2013/12/sketch-90-design-team-reveal.html
I rarely make cards, but had some time and some left overs from a layout and thought why not!!
I entered this into a challenge to use roses here http://theshabbytearoom.blogspot.com.au/
as I fell in love with the prettiness of this site and all they do.


I WILL DRAW A WINNER NEXT WEEK.
MANY THANKS FOR FOLLOWING ME ANDVISITING MY BLOG I REALLY APPRECIATE IT - HOPE YOU COME BY AGAIN SOON - BYE FOR NOW.

Wednesday, 8 January 2014

FRIENDS-FOREVER


Hi everyone and welcome to my blog.
Here is my latest layout. I have found inspiration from lots of sources.
Wild Orchid Crafts are having a challenge to use buttons, my mini roses are from them. http://wildorchidchallenge.blogspot.co.uk/
Berry71Bleu challenge is here http://berry71bleu.blogspot.co.uk/
Scrapping Every Day Miracles http://scrappingeverydaymiracles.blogspot.co.uk/2014/01/welcome-to-2014-3-challenges.html
SO HERES HOW
Matt photo
Take a pretty paper, paste and a mask (I used a Prima one), add the paste to the top left and bottom right corner
Allow to dry.
Rip paper to 9.5 x10.5 inches
Tear a strip down the middle a few inches either way
Curl the edges back
Adhere photo
Rip another paper down to 11 x 10.5 inches
Adhere papers to cardstock
Start decorating with embellishments
Don't forget to add the buttons.
SCRAPPY STASH
Websters pages papers
Prima script mask
My own paste http://theprettypaperpatisserie.blogspot.co.uk/2013/04/homemade-texture-past.html
Black cardstock
Prima clock cut from packaging
Clock face here http://www.pinterest.com/caroleanne345/clocks/
Heart die from Sizzix
Doily cut using Martha Stewart doily cutter
Branch die from Sizzix (tattered pinecone)
Butterfly here http://www.pinterest.com/caroleanne345/butterflies/
Mini roses from Wild Orchid Crafts
Hand cut flowers here http://theprettypaperpatisserie.blogspot.co.uk/2013/03/hand-made-flowers-tutorial.html
Handmade flowers using Spellbinders dies
Various buttons
Key die by Sizzix
Mini frame from stash
Zip pull from stash
White feather from a Cest Magnifique kit http://cestmagnifiquekits.blogspot.co.uk/p/blog-page_10.html

MANY THANKS FOR VISITING MY BLOG AND LEAVING ME LOVELY COMMENTS
SEE YOU BACK HERE ON FRIDAY WHEN I WILL BE HAVING SOME CANDY FOR MY FOLLOWERS TO WIN


Friday, 3 January 2014

STUCK ON U SKETCHES DESIGN TEAM REVEAL FRIDAY - LET IT SNOW


http://stuckonusketches.blogspot.co.uk/

Hi everyone and A HAPPY NEW YEAR. Hope you had a great Christmas and New Year.
Welcome to STUCK ON U SKETCHES DESIGN TEAM REVEAL. The first one for 2014.
I decided to use a seasonal photo for this one, a photo of Jessie when she was a toddler.
HERES HOW
Choose pretty background paper, mine had snowflakes printed on it.
Choose plain cardstock to match.
Cut out some doily shapes or circles. I chose 6 inch circles.
Matt photo, distress and ink the edges.
Adhere large white doily to page.
Add photo.
Cut out various doilies or circles as per the sketch, ink the edges, adhere.
Start to embellish, tucking some embellies behind the photo.
Add die cut snowflakes, flowers, butterflies etc.
Add the title.
SCRAPPY STASH
Plain cardstock
Pretty Paper
Martha Stewart Doily Circle cutter for the doilies
White paper doily
Brown chalk ink
Sizzix sizzlits snowflake die
Cheery Lyn butterfly die
Black glitter cardstock
Martha stewart paper clay frame
Beaded pins http://theprettypaperpatisserie.blogspot.co.uk/2012/06/hand-made-stick-pins.html
Assorted flowers
Rayon ribbon in golden yellow
Black flourish
Glass beads
Fuzzy fibre in white
Clock faces http://www.pinterest.com/caroleanne345/clocks/
Title from a Christmas set of titles by creative memories (had them for ages)
Hand made flowers http://theprettypaperpatisserie.blogspot.co.uk/2013/03/hand-made-flowers-tutorial.html
Silver burlap/hessian.
Hope you like it and give it a go, its a really great sketch to start the new year.


.

Thursday, 2 January 2014

HAPPY NEW YEAR EVERYONE


THE LONDON EYE - NEW YEARS EVE

HAPPY NEW YEAR EVERYONE AND I PRAY ITS A BLESSED AND PEACEFUL ONE.

SEE YOU ALL TOMORROW FOR THE STUCK ON U SKETCHES DESIGN TEAM REVEAL
http://stuckonusketches.blogspot.co.uk/

BYE FOR NOW.