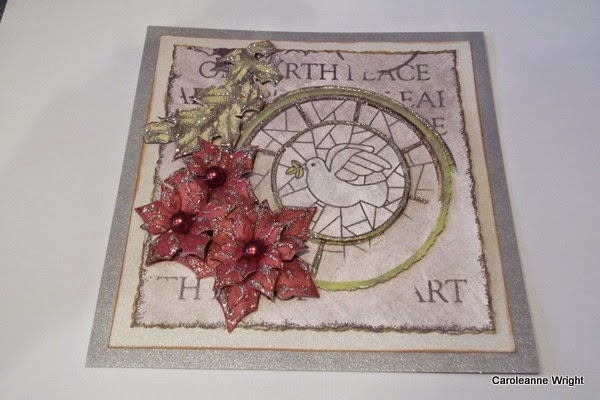
Hi everyone and welcome to my blog and the CARDABILITIES design team reveal.
SPONSERED BY PICKLED - POTPOURRI
website: http://www.pickled-potpourri.com/
store: http://www.pickled-potpourri.com/digital-stamps
Facebook: https://www.facebook.com/PickledPotpourri
HERE IS A BUILD A CARD TUTORIAL
Step 1
Enlarge the digi stamp and print three times onto cardstock
Sponge on silver metallic paint to all stamped images, allow to dry, then cut out the background of the first stamp using deckle edged scissors
Step 2
Take the second digi stamp, cut out the large circle, colour in, ink the edges and attach with foam pads.
Do the same with the smaller circle with the bird, cut out and attach with foam pads and colour in
Step 3
Matt onto cream cardstock, ink the edges
Matt onto dark silver cardstock, ink the edges
Step 4
Cut out the holly from the digi stamp, colour in and adhere
Step 5
Make three poinsettias, add glitter, pearls and adhere with hot glue
Step 6
Finish by adding glitter glue to the holly and circles, add some pearls and colour- in where desired, add a sentiment with foam pads
Attach to the front of a 6x6 inch card blank.
P.S I took off the cream cardstock at the end as it really didn't need it.
STASH
One 6x6 inch card blank
Plain cardstock - white, to print onto
Other cardstock, light silver, dark silver, red
Digi stamp from http://www.pickled-potpourri.com/
Silver metallic paint and small make-up sponge
Chalk ink
Sticky back pearls
Silver Stickles glitter glue
Small black bead for birds eye
Marvey colouring-in pens
Sentiment - Heartfelt Creations Christmas Collection Pad
Foam Pads
Hot glue gun
Poinsettia stamp and dies - Heartfelt Creations/Spellbinders
MANY THANKS FOR VISITING MY BLOG TODAY,
I HOPE YOU HAVE FOUND SOME INSPIRATION.
DO VISIT ALL THE DESIGN TEAM FOR LOTS MORE FAB CARDS.
BYE FOR NOW


Great :) It is wonderful idea to show how the card was made!
ReplyDeleteAmazing card! It's wonderful :)
ReplyDelete