
Hi Heartfelt Crafters, Its Inspiration Wednesday today and I have a card up for you using the gorgeous
COTTAGE GARDEN Collection.

PRODUCTS USED
Designer Dries Clear Adhesive, 159723
Rounded Window Frame Die, HCD1-7271
Cottage Garden Hydrangea Die, HCD1-7278
Fresh Cut Hydrangea Die, HCD1-7279
Cottage Garden Paper Collection, HCDP1-2111
3D Hydrangea Shaping Mold, HCFB1-489
Cottage Garden Hydrangea Cling Stamp Set, HCPC-3900
Fresh Cut Hydrangea Cling Stamp Set, HCPC-3901
Deluxe Flower Shaping Paper Pack of 25 - White, HCPP1-468
Bright Bead Stamens-Medium, HCS1-458-3
Deluxe Flower Shaping Kit, HCST1-401
Ranger Archival Ink Pad - Olive, RACP482
Cottage Garden Collection


HCD1-7278
Cottage Garden Hydrangea Die
HCD1-7279 Fresh Cut Hydrangea Die
HCPC-3900 Cottage Garden Hydrangea Cling Stamp Set
HCPC-3901 Fresh Cut Hydrangea Cling Stamp Set
HCDP1-2111 Cottage Garden Paper Collection
HCFB1-489 3D Hydrangea Shaping Mold
HCD1 7271 Rounded Window Frame Die
HCD1-7279 Fresh Cut Hydrangea Die
HCPC-3900 Cottage Garden Hydrangea Cling Stamp Set
HCPC-3901 Fresh Cut Hydrangea Cling Stamp Set
HCDP1-2111 Cottage Garden Paper Collection
HCFB1-489 3D Hydrangea Shaping Mold
HCD1 7271 Rounded Window Frame Die
Ranger Archival Ink - Olive
Small white bead stamens
Dries Clear Designer Adhesive
Deluxe Flower Shaping Paper
Deluxe Flower Shaping Tool Kit
Deluxe Flower Shaping Tool Kit
OTHER PRODUCTS USED
White 7x7inch card blank, white card, Ranger Distress ink - Shaded Lilac, Antique Linen, Hot glue gun, foam tape, Chunky Glitter.

INSTRUCTIONS
Instructions: Cover a 7-inch square card blank with blue paper from the Cottage Garden Paper Collection. Cut out a blue 6-inch square panel and adhere to the front of the card using foam tape. Take the rounded Window Frame Die and cut out in white card. Adhere this to the front of the card.
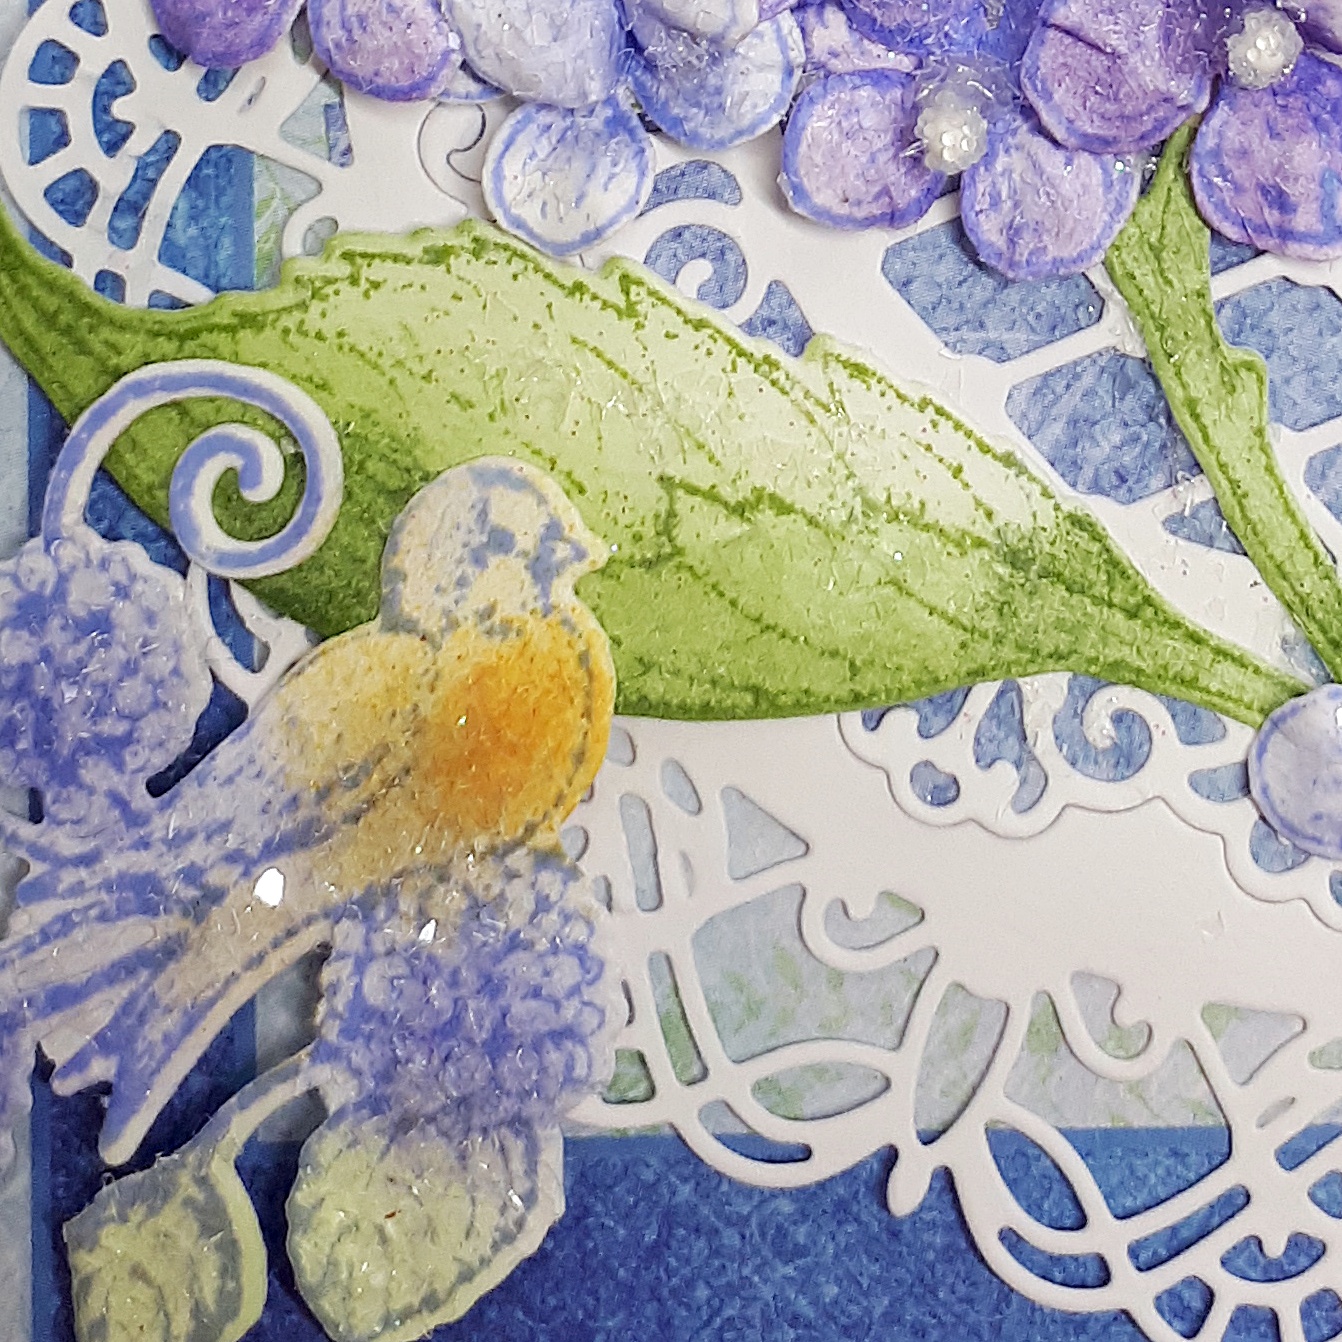
Take the Cottage Garden Hydrangea Stamp, and stamp onto Deluxe Flower Shaping Paper in Shaded Lilac ink and Olive inks one large Hydrangea and lots of blooms. Color in with Shaded Lilac ink and Olive ink. Die cut with the coordinating dies. Add all the blooms to the Flower Shaping Mold, lightly spritz with water and run through a die cutting machine. When dry, tap out and leave to dry. When dry pierce a small hole in the center of the blooms. You will need about 30 blooms. Thread a white stamen through the holes. Add hot glue to the back to hold in place and when dry cut off the wires.
Start adhering all the blooms to the large Hydrangea die cut., starting in the center and working outwards. When full, adhere the finished Hydrangea to the front of the card using hot glue.
Take the Fresh Cut Hydrangea Stamp, stamp onto Deluxe Flower Shaping paper, color in with Olive, Shaded Lilac and Antique Linen inks. Die cut with the co ordinating die. Cut the die cut in half. Add one little bird cluster to one side of the card. Cut out a sentiment, add foam pads, adhere. Adhere the other little bird cluster below the sentiment. Adhere a few more blooms either side of the sentiment. All done.
VIDEO LINKS
Cottage Garden Collection watch the tutorial at https://youtu.be/faBoB2s49RI.

I would really appreciate your votes to stay on this amazing team. If you like my work then please can I ask you to vote for me by clicking on the link below. A heads up, you will need to vote for 5 designers. Thank you so much ❤️
Many thanks for visiting today and don't forget to visit the
Heartfelt Creations Blog for lots more inspiration from the team.
Bye for now
xxx
Beautiful card Carole! I'm loving the colors.
ReplyDeleteCongratulations! Such a beauty!
ReplyDelete