Thursday, 21 January 2016

MY FIRST MINI ALBUM

 
Hi everyone  here is my first attempt at a mini album, I hope you like it. It is full of flaps and pull outs. It is made from 300gsm cardstock and I have inked all the edges to give a shabby feel.  I have included lots of tuck spots and belly bands and I used a button on the front for the closure then wrapped ribbon around it. It did become a bit chunky by the time I finished!
I cant wait to make another one now, I think these could become addictive to make! 


That's all for today, do pop back again soon to see more scrappiness and inspiration.
Also I would love it if you would become a follower and leave me some happy comments.
See you back here on the 25th with a Crafters Palette Project.
Bye for now.
xxx

Saturday, 16 January 2016

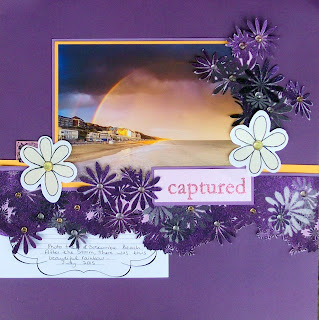
THE ROBINS NEST DESIGN TEAM REVEAL - CAPTURED


Hi everyone welcome to my blog and the
 ROBINS NEST Design Team Reveal.
For this layout I used the theme of Rainbows for my inspiration.
I had this fabulous photo of the evening after the big storm, from last Summer and knew it would be just perfect.
HERE IS A STEP BY STEP ON HOW I DID THIS

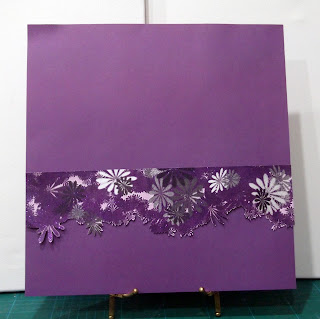
I chose 2 sheets of the purple glitter flowers paper
And used the reverse side of one sheet
I then cut out a border of flowers from the other sheet
I added a lilac border strip of cardstock
I added another strip in yellow
I double matted my photo in both these colours
I added two lemon flowers with gems
I cut some more of the flowers out and attached

Add some tags (clippies) and the title (matted)
Add the journaling block and the gems.
SOME CLOSE UPS


PRODUCTS USED
YELLOW CARDSTOCK STRIP
LILAC CARDSTOCK STRIP
xxx
THATS ALL FROM ME BYE FOR NOW


Thursday, 14 January 2016

BERRY BLEU DESIGN TEAM REVEAL JANUARY MOOD BOARD - GET YOUR SPARKLE ON


Hi everyone and welcome to my blog and the Berry71Bleu
 January 2016 Mood Board - Get Your Sparkle On.

This is a fabulous Mood Board by Marie, I hope you like it and have a go.
For my layout I used the colours, feathers, flower, cake design and journal tags for my inspiration.
xxx 
THIS IS HOW I DID MINE
Choose photo, papers, card and embellies
Splash some white paint over the page
Matt photo
Matt again, ink edges
Cut out a 6.5 inch square in card, then, using texture paste and a stencil make another matt
When dry adhere all these matts to your page
Cut out some white corrugated card and add these as layers as per my layout
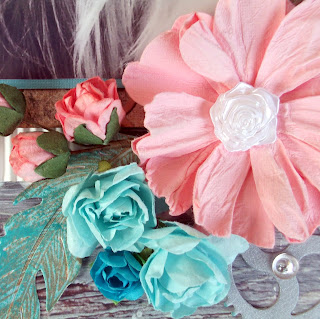
Next start to decorate using feathers and flowers
Add some lacy die cuts
Add some sparkly buttons
Add the matted journaling strips
Add some cogs and gems
Last but not least, add the title.
xxx
SCRAPPY STASH
Cardstock in blue, silver and white
Pretty papers Barn Market by
Texture paste
White acrylic paint
Brown and aqua ink pads
Corrugated card
Sticker journaling strips - Thoughts Keeper by 7 DOTS STUDIO
Assorted flowers
Assorted buttons
Flourish Die
Feathers
Cogs Die
Gems
Feather stamp and die
Title - Beautiful  CREATIVE EMBELLISHMENTS
xxx
XXX
SOME CLOSE UPS


AND NOW FOR THE PRIZES
  

Our sponsor this month is

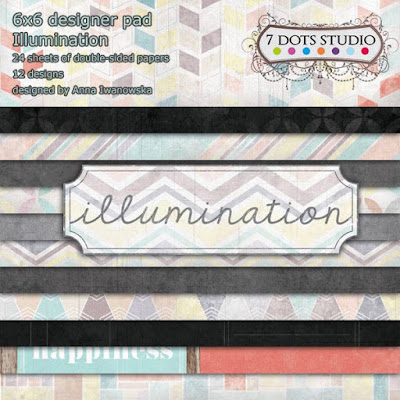
We are a team of creative women who cannot image their world without paper, glue and the creative process. Scrapbooking is our passion and we love to share our passion with other scrapbookers. For this reason, 7 Dots Studio exists. The quality of our products is our top priority. Our lines consist of papers, stickers, die-cut elements, clear stamps, stencils and chipboard pieces. You can find our products in scrapbooking stores around the world.


OUR WINNER WILL RECEIVE THIS FAB COLLECTION


Even though Christmas has passed this collection is really, really versatile! And this years Christmas Pictures can be used straight away too!

One Random winner will receive this prize.


Please note: International winners may be responsible for shipping costs.
Please be sure to follow our CHALLENGE RULES.


Thank you and we hope to see your beautiful creations this month!

We appreciate each and every challenge entry and share the designs that catch our eye on our facebook page and Pinterest Boards. Look for your work there.
XXX

Tuesday, 12 January 2016

CRAFTERS PALETTE DESIGN TEAM REVEAL - JANUARY PAGE MAP - MILLIE

Hi everyone HAPPY NEW YEAR.
Carole here with you today, with my first Design Team Project.
I am so excited to start the new year with this fab design team and this brilliant January Page Map Challenge.
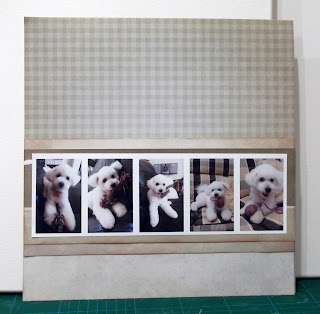
If you love using multiple photos on your layouts, then this is the challenge for you. I created this scrapbook layout using the Page Map above and five photos. I pretty much followed the sketch as is, and you can do the same. I am not great with lots of white space, so this really was a challenge for me too!


INSTRUCTIONS
Choose photos, papers, cardstock and embellishments

Start with a sheet of 12 x 12 pretty paper

Add a co-ordinating border five inches deep, ink the edges

Add another strip, ink the edges, slide under the main border


Matt photos, ink edges and adhere


Cut two layers 6 x 3 inches, ink edges, adhere as per layout

Stamp a small piece of paper 3.5 x 2 inches, using a script stamp, ink the edges, adhere as per layout


Now decorate with flowers, butterflies and a doily
Add the title.


PRODUCTS USED
12 x 12 Assorted Scrapbook papers
Distress Ink Pad by Ranger
 Stamp by Kaisercraft – Script
Paper Doilies by Wood ware
Butterfly Punch
Self-Adhesive Gems
Assorted Flowers.

Many thanks for visiting today, do look out for more inspiration from the Crafters Palette Team.

Bye for now.


Friday, 8 January 2016

STORAGE IDEAS - LACE ORGANIZATION FOR YOUR CRAFT ROOM for CRAFTERS PALLETE DESIGN TEAM


Hi everyone,  every crafters' New Years Resolution has got to be to sort and organise their craft room. This month  the Crafters Palette Design Team will be sharing our top tips and tricks for storing and organising crafting supplies.  Here is a quick, easy and pretty way to organize your lace offcuts.

HERES HOW
 

Take a cardboard roll and cover with pretty paper


Just glue the paper around the roll


Now add the lace
 
 
Add a pin
 
 
Cut out two circles aprox 2.5 or 3 inches, ink edges
I think 3 inches, as mine look a little small at 2.5 ins
 
 
Glue to the top and base of roll
 
 
Embellish the top, I used a pretty fabric flower from my stash.
 
And there you have it,  you need never have all your lace in a mess again. Works well for ribbons too. These look really petty all lined up on a shelf, in a drawer or see - through box.
That's all for now, do pop by again soon.
Many thanks