Friday, 30 August 2013

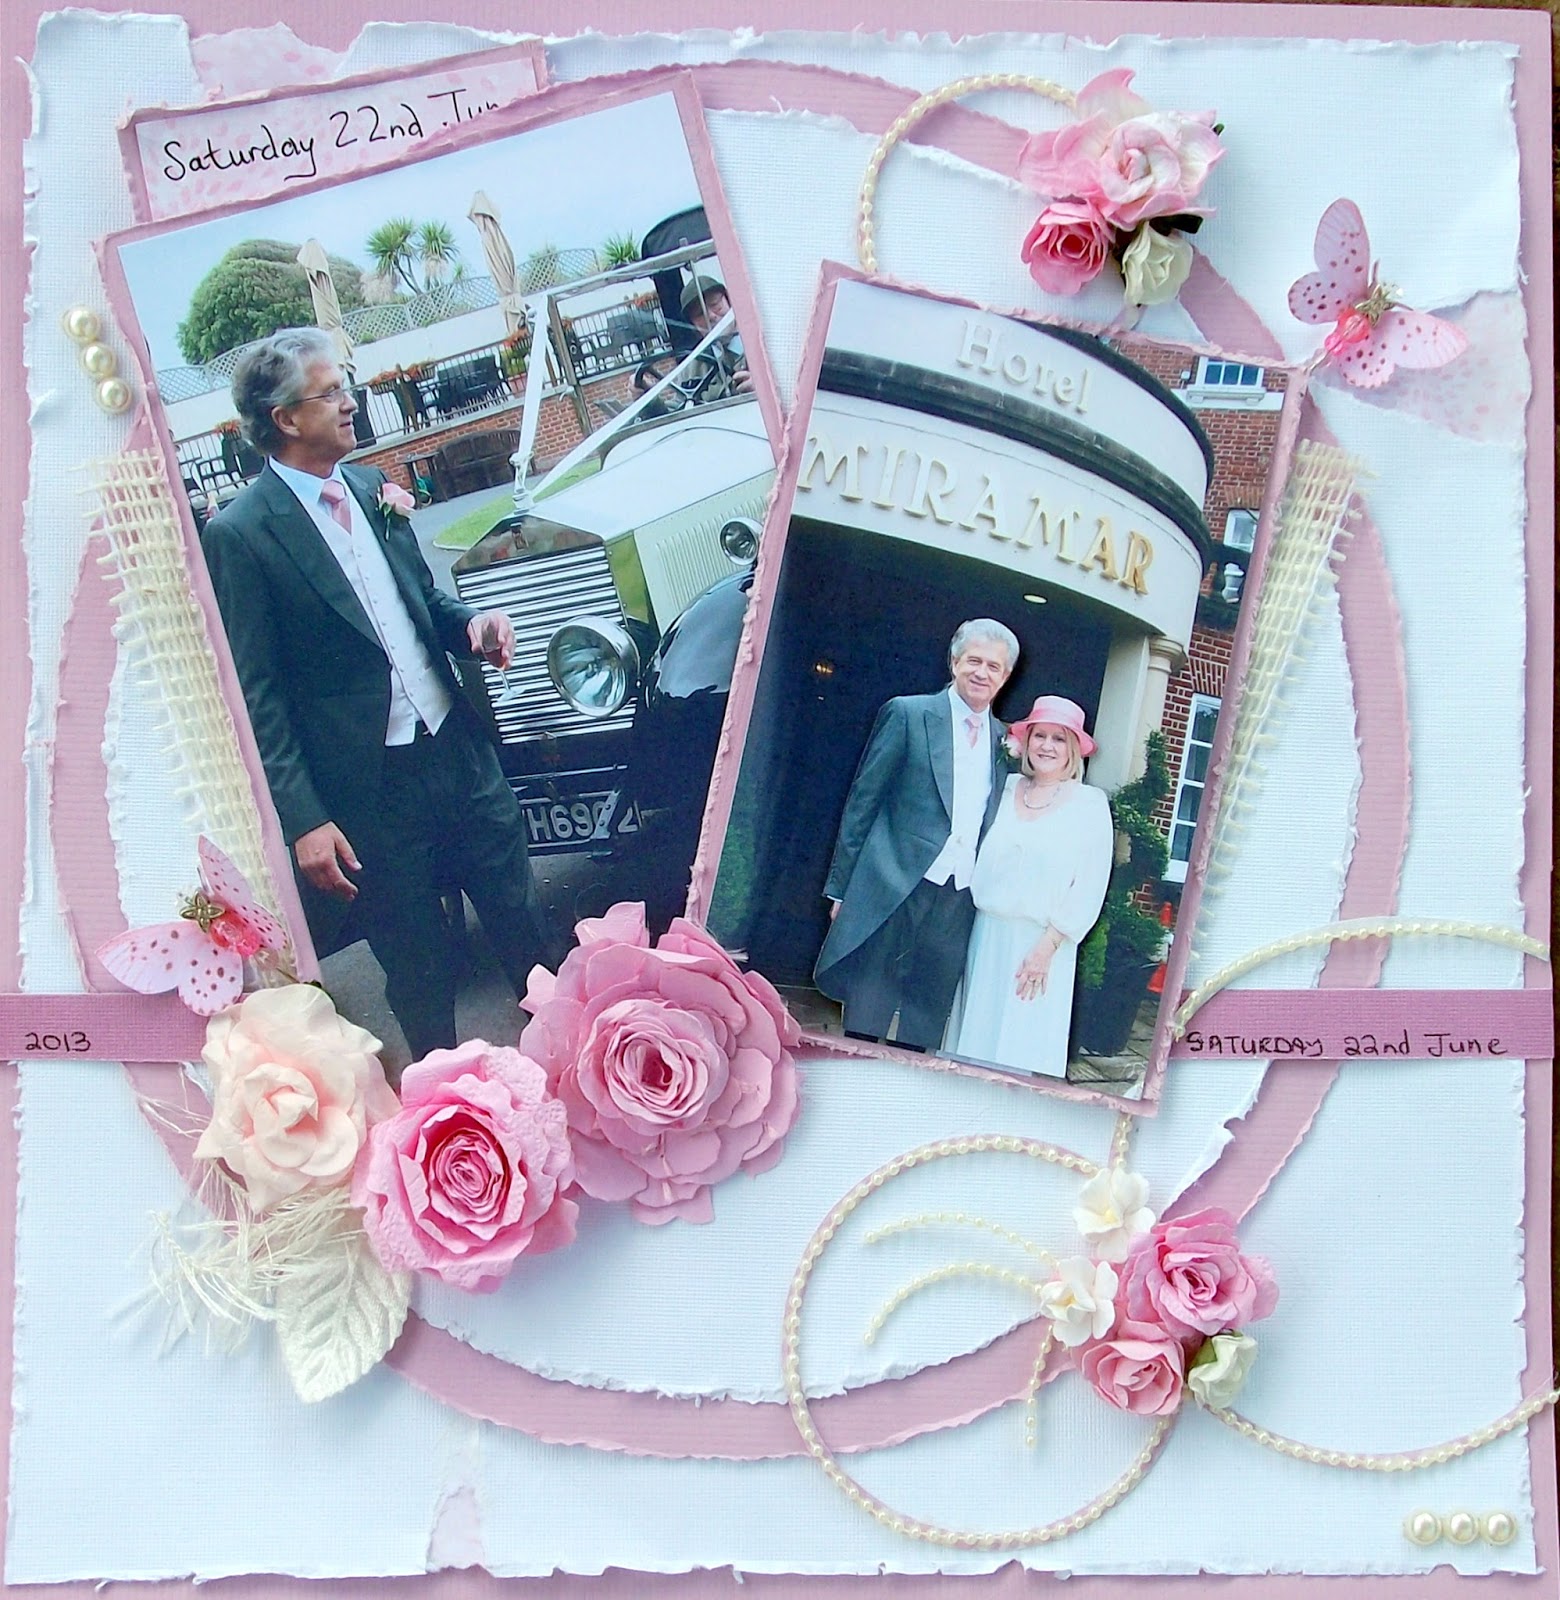
STUCK ON U SKETCHES DESIGN TEAM REVEAL - HOTEL MIRAMAR


http://stuckonusketches.blogspot.co.uk/

Hi everyone and welcome to the Stuck On U Sketches Design Team Sketch Reveal.
 
If you love sketches then you will love this. Lots to play with here.
HOW I PUT THIS LAYOUT TOGETHER
First of all choose your photos and then your colours.
Put together your cardstock and papers and embellishments.
Cut down a white sheet of cardstock to 11.5 x 11.5 inches and distress the edges.
Adhere to your background cardstock.
Cut two circles out of contrasting card and distress the edges. (I used a couple of plates for this).
Matt your photos and distress the edges.
Adhere to the circles and add a half inch border across the page.
Now to embellish.
I used pearl string for my circles. I cut out small circles in cardstock and glued the string on top using a glue gun.
I then made some mulberry paper flowers and used the glue gun go attach.
I added some small roses, funky fibres, a prima velvet leaf and two of my handmade butterflies with beaded  bodies.
I also added some white hessian/burlap and some larger pearls.
Why not give it a go.
SCRAPPY STASH
Plain cardstock
White hessian/burlap
Mulberry paper for the flowers
Pearl string
Large sticky back pearls
Prima white velvet leaf
Journaling block, partitialy hidden
Butterflies and beads for bodies.
THANK YOU FOR VISITING MY BLOG, I REALLY APPRECIATE ALL YOUR LOVELY COMMENTS.


Thursday, 29 August 2013

HERITAGE


Morning lovely scrappers.

For todays layout I have used inspiration  from Berry 71 Bleu - August challenge -  to use textiles.
http://berry71bleu.blogspot.co.uk
No sketch for this one, I just winged it!
For this layout I applied Gesso all over my background cardstock to dull it down a little to give more of a vintage feel. I also misted the background with some tattered angels mists.
I then matted my photo and adhered to my cardstock.
I  started adding my layers, starting with the large doily.
Next I added some cardboard that I painted white.
I added another doily with green backing card.
For my textiles I made a hessian/burlap flower, a bow in hessian/burlap, and a piece of cotton seam binding that I sprayed with glimmer mist and ruched and attached with hot glue.
Then I added in a few extra layers that I inked and used some alphas for the title.
I added a metal button for my flower centre and decorated with assorted flowers and butterflies.
SCRAPPY STASH
Plain cardstock
Pretty paper
White doilies
White gesso
White paint
Cardboard
Hessian/Burlap
White seam binding
Butterflies and beads
Metal button
Assorted flowers
Websters pages alphabet stickers.
I hope you like it.
THANK YOU SO MUCH FOR VISITING MY BLOG AND LEAVING ME LOVELY COMMENTS, I REALLY APPRECIATE IT.

Wednesday, 28 August 2013

FRIENDS


Hi everyone,
here is a layout I have done using the C'EST MAGNIFIQUE sketch challenge for August.
http://cestmagnifiquekits.blogspot.co.uk/2013/08/our-august-sketch-challenge.html


For this layout I chose to change the photo into black and white as all the colours were very mixed and very busy.  I used pink, soft golden yellow and brown with some white as I wanted a girly feel.
THIS IS WHAT I DID
I cut down a piece of white cardstock to 11.5x11.5 inches and sprayed and speckled with mists in gold, pink and copper.
I attached to a sheet of brown cardstock.
I then matted my photo in white, pink and some brown card.
I attached this to my background card and added a doily in one corner.
I then made my title banner and adhered.
I then started to decorate with assorted flowers, leaves, mini roses, pearl strands, butterflies with beaded bodies and an angel I made from clay using a mould.
I hope you like it and check out the challenge.
Have a great day, Bye For Now.

SCRAPPY STASH
Plain cardstock - white brown and pink
White doily
Handmade butterflies and beaded bodies
Assorted flowers
Pearl strands
Assorted glimmer mists
Tim Holtz alphabet set
Prima velvet leaf
Angel mould and white clay.

SEE YOU BACK HERE ON FRIDAY WITH THE STUCK ON U SKETCHES REVEAL

Friday, 23 August 2013

KISSES FOR LALA - BUILD A PAGE


http://sketcheswithatwist.blogspot.co.uk/2013/08/this-months-sketch-is-fabulous-sketch-i.html

Hi everyone, I saw this sketch with SKETCHES WITH A TWIST and http://showusyourstuff.blogspot.com.au/2013/08/august-challenge.html 
I thought this was a brilliant sketch so decided to give it a go.
 Just click on the link above to take you to the challenge. 
 I  turned the sketch on its side. The twist is to use a safety pin which I have used to attach my title block.
I HAVE ALSO DONE A TUTORIAL BUILD A PAGE FOR YOU.
 
I have entered this in to C.S.I and the special Scrap 365 August challenge. 
http://csicolorstoriesinspiration.ning.com/forum/topics/case-file-no-s535-1-special-scrap365-case-file-closes-august-31-2   

So many challenges, so little time!!! I usually only enter one at a time, so have gone a bit mad with this one!! I loved the colour combo at C.S.I and knew it would fit my photo perfectly. It just so happens that both the sketch and the colour scheme were doubled up this month. Just scroll down for the BUILD A PAGE to see how to put a page together using this sketch in ten easy steps.


 Step 1
Tear around a sheet of polka dot paper to 11x11 inches
Step 2 
 Step 3
 Step 4
 Step 5
 Step 6
 Step 7
 Step 8
 Step 9


Step 10


SCRAPPY STASH
Plain cardstock - white, brown and light yellow
Polka dot cardstock
Doily
Twine
Butterflies with beaded bodies
Martha Stewart bird from paper clay
Blue and brown chalk ink
Assorted flowers
Funky fibres in white
Leaf
C.S.I papers.


Thursday, 22 August 2013

OFF THE PAGE REVERSE CANVAS


Hi everyone, hope you are having an awesome summer.
I have been meaning to do a mixed media  shabby chic canvas for a while, and here it is.
I bought a 12x12 canvas and reversed it.
I painted all the edges with gesso and started applying loads of texture. I added muslin to all the edges, then lace and kept adding more gesso. When this had dried I added flowers, butterflies, die cut chipboard keys, locks, branches etc and painted all with gesso and fine texture paste. I then sprayed everything in three colours of glimmer mist. I  decorated a 12x12 page with doilies, flowers and funky fibres. I glued this to the centre of the canvas back.
I have entered this in to a challenge at http://berry71bleu.blogspot.co.uk/ -  using textiles - August challenge.
Also flying unicorn challenge for mixed media, you can find here  http://flyingunicornforums.com/.
Hope you like it.
Bye for now.

Friday, 16 August 2013

STUCK ON U SKETCHES DESIGN TEAM SKETCH REVEAL AND BUILD A PAGE


http://stuckonusketches.blogspot.co.uk/


MORNING ALL AND WELCOME TO THE STUCK ON U SKETCHES DESIGN TEAM SKETCH REVEAL AND MY LAYOUT WITH A BUILD A PAGE STEP BY STEP.

I hope you get to view all the designers work for lots of inspiration.
For todays layout I have a BUILD A PAGE FOR YOU, so you can follow along step by step.

 step I .
Choose your background card and your pretty paper.
I chose a polka dot paper by My Minds Eye which I then cut down to 11x11 inches.
I distressed the edges, inked the edges, misted and painted with light modelling paste.
 step 2.
Add a circle of cardboard and ink the edges.


step 3.
Add a white doily.


step 4.
Add another pretty paper, this one is from Prima, cut it down to 9.5x8 inches, distress and ink edges.

 step 5.
Matt your photo three times, distressing all the edges as you go. Adhere.


step 6.
Cut a piece of matching cardstock 11x2 inches and distress the edges.


step 7.
Add the title.
 
 step 8.
Embellish.
And there you have it. Hope you like it and give it a go.
Have a great week end.
 
SCRAPPY STASH
Plain cardstock in three colours
Pretty papers x 2
Cardboard
Doily
Brown ink
Assorted flowers
Butterflies and beaded bodies
Modelling paste
Mists in brown and gold
Antique buttons.
 
THANK YOU FOR VISITING MY BLOG AND LEAVING ME YOUR WONDERFUL COMMENTS WHICH I REALLY APPRECIATE. BYE FOR NOW.


Friday, 9 August 2013

BEACHY


Morning all and happy Friday. Here is a layout I have just finished for a sketch challenge over at Inkido http://inkido.blogspot.co.uk/2013/08/august-challenge-augusti-utmaning.html just click on this link if you want to give it a go. I have also combined this sketch with The Color Room  #156 for my colour combo. You can find it here http://www.thecolorrooms.com/index.html
 
For this layout I wanted to keep things looking a little bit heritage because of the photo.
 
This is what I did.
First I cut down a piece of pretty pink paper to 11x11 inches and distressed the edges.
I then set about distressing the background. I used mists that I sprayed, flicked and dabbed with a kitchen towel in three different colours and allowed to dry.
I then went over this with a sponge and a pink Pan Pastel to give a delicate pink hue.
I then chose my background cardstock to co ordinate with my picture. I adhered my paper to this.
I then matted my photo in the same cardstock and distressed the edges.
I cut out the border strips from the same cardstock and some script paper and adhered these.
I added some white pen to the edges.
I then started to decorate with flowers and shells using a glue gun.
I used alpha stickers for the title.
Why not give it a go.
 
SCRAPPY STASH
Plain cardstock
Pretty papers (Prima and My Minds Eye)
White gel pen
Assorted flowers
Distress tool by Prima
Alpha stickers by Basic Grey
Shells from the beach
Shell punch by Woodware
Pink pan pastel and sponge.
 
THANK YOU SO MUCH FOR VISITING MY BLOG AND LEAVING ME ENCOURAGING COMMENTS.  HAVE A GREAT WEEK END. BYE FOR NOW.


Friday, 2 August 2013

THE 60s - DESIGN TEAM SKETCH REVEAL FOR STUCK ON U SKETCHES


Hi everyone and welcome to the Stuck On U Sketches Design Team Reveal.
I hope you are having a great Summer and are taking lots of photos to scrap.

For this reveal I have used this great sketch by Leah, which I hope inspires you to have a go.

http://stuckonusketches.blogspot.co.uk/


For my layout I have  taken a pretty pink patterned paper and cut it down to 11.5x11.5 inches and distressed the edges.
I adhered this to a plain piece of pink cardstock.
I then took another piece of the same cardstock and cut it down to 5.5 x 11 inches and distressed the edges and adhered this down the side.
I matted my photo in some script paper and distressed the edges.
I attached this to the pink cardstock and added two small doilies, one at the top and one at the base.
I added a small Prima journaling box under the photo.
I then added a circle in pink to the side.
I attached some white scalloped lace to the circle.
I added a smaller pink circle on top.
I attached some fibre to the small circle.
I attached some pink velvet ribbon down the side panel.
I added some honeycomb chipboard that I painted white.
I then started to decorate with my flowers and butterflies.
I also added some fuzzy fibres and the title.
I hope you like it and give it a go.
 
Don't forget to stop off at all the designers blogs for more inspiration. 
 
SCRAPPY STASH
Plain pink cardstock
Patterned paper
White lace
White fibres
White fuzzy fibre
White paint dabber
Honeycomb chipboard (Dusty Attic)
Assorted flowers
Hand made butterflies and bodies
White doilies
Websters pages alpha stickers
Prima journaling box
Pink velvet ribbon.
 
Thank you so much for visiting my blog and leaving me your lovely comments, they really make my day.
Happy scrapping.


Friday, 19 July 2013

STUCK ON U SKETCHES DESIGN TEAM REVEAL - WOOF - July 19th


http://stuckonusketches.blogspot.co.uk/
WELCOME TO MY BLOG AND THE STUCK ON U SKETCHES DESIGN TEAM REVEAL

I really loved this sketch and hope you do too. If you want lots of inspiration do go visit all the designers blogs and give this one a go.

For my layout, I chose this lovely photo of Bailey and tried to match the colour of his coat.
I matted the photo in the same colour cardstock as my backing paper and inked the edges. (I gutted the backing card).
I added some pretty paper that I cut down to 11.5x11.5 inches and inked.
I added a doily and a circle that I inked.
I attached my matted photo.
I added a journaling block that I tucked under the circle.
I added two scalloped borders and started to decorate.
I made some  mulberry flowers (see tutorials), and added in a few others.
I cut out some butterflies and made them some black beaded bodies.
I added some white funky fibres and a sticker title.
I hope you like it and give it a go.
SCRAPPY STASH
Plain cardstock
Pretty paper
White doily
Deckle edge scissors for the circle
Brown chalk ink
Hand made mulberry flowers
Hand cut butterflies
Hand made beaded pins
Assorted flowers
Bronze sticky back pearls
Brown fuzzy felt alphas
White funky fibre
Scallop edge ruler.

Thank you for stopping by and many thanks for your lovely comments, they are much appreciated.
BYE FOR NOW.

Friday, 5 July 2013

STUCK O U SKETCHES DESIGN TEAM REVEAL - BEACH BAR - July 5th


WELCOME TO MY BLOG AND THE STUCK ON U SKETCHES DESIGN TEAM REVEAL.

http://stuckonusketches.blogspot.co.uk/
Here is the lovely sketch by Nanne.
http://nannes-creations.blogspot.co.uk/

Do go visit the Stuck on U Sketches blog and give this a go.
And don't forget to visit all the designers for some inspiration.
 
This is  how I did mine.
I first chose  my colours, pink, black and white.
I took a 12x12 white cardstock and mounted a black scalloped cardstock on the top.
I cut down a piece of pink cardstock to 10x10inches and rounded the corners.
I added some white doilies. (Two rectangles put together).
I then added some pretty paper 8.5 x 8 inches and added two black scalloped borders.
I mounted my photo onto pink and black cardstock and then a doily. (rectangular).
I adhered this to the pretty paper.
Now its time to decorate. I made the large rose and some of the smaller ones from mulberry paper.(See tutorials).
I cut out a butterfly and made a pink beaded body. (See tutorial).
I added lots of flowers with pearl centres.
Last but not least I added the title using some stickers.
I hope you like it and give it a go.
SCRAPPY STASH
Plain cardstock in three colours
White rectangular doilies x 3
Pretty paper - Bo Bunny
Scalloped cardstock - DCWV
Mulberry paper for the flowers
Assorted flowers and sticky back pearls
Butterfly with beaded pin body.
Thank you so much for stopping by, do leave me a comment as I really appreciate them.
BYE FOR NOW.


Monday, 1 July 2013

OFF THE PAGE - BIRDCAGE


Hi everyone, I hope you like this little birdcage I did. I attached a photo to the inside then decorated with lots of flowers, pearls, butterfly and a feather and lace. Just use a hot glue gun. I also added some flowers to the inside. A project that took under an hour.
Have a happy scrappy day, Bye For Now.

Thursday, 20 June 2013

STUCK ON U SKETCHES DESIGN TEAM REVEAL - June 21ST - PAMPERED


HELLO AND WELCOME TO MY BLOG AND THE STUCK ON U SKETCHES DESIGN TEAM REVEAL AND WONDERFUL SKETCH BY SANDI CLARKSON

http://stuckonusketches.blogspot.co.uk/

I loved this sketch although I may have overdone the embellishing and layering part! 
Do go visit all the designers blogs for lots of inspiration and have fun along the way.
This is how I put mine together.
I chose camel and aqua from the photo and took some camel 12x12 paper and a doily edge punch and punched all around the edge. I attached this to my aqua backing card.
I then added some pretty paper which I cut down to 11x11 inches.
I mounted my photo onto the aqua cardstock.
I matted this onto some camel cardstock, cut down to 9x7inches, inked the edges and adhered to my pretty paper.
I then added the centre border scalloped card and added a piece of ribbon down the side.
I added some cream scalloped cardstock to opposite corners.
I added some ribbon and lace.
Then  added my honeycomb chipboard pieces.
Next I started to decorate with my flowers and butterflies.
I added some doily pieces and a cardboard layer.
Last but not least I added the title.
I hope you like it and give it a go.
 
SCRAPPY STASH
Plain cardstock
Pretty paper
Scalloped cardstock
Dusty attic honeycomb chipboard
Mini doilies
Piece of cardboard
Lace
Ribbons
Butterflies
Beaded pins
Martha Stewart Punch around the page doily punch
Assorted flowers and sticky back pearls
Sticker letters.


Tuesday, 18 June 2013

MAJORCA


Hi everyone and welcome to my blog. I have not uploaded for a while due to illness but am feeling much better now.
Here is my latest layout. No outside inspiration used for this one, I just went for it!
I used a small photo for a change and chose pink, white and grey for my colour scheme.
I attached some doilies onto my plain pink background cardstock.
I attached some scallop edged card in grey.
I added a sheet of Bo Bunny pretty paper and scalloped the edges with a pair of scallop scissors.
I matted my photo in pink cardstock.
I added some doilies underneath the photo.
Then I started to decorate with lots of flowers.
Tutorial here http://theprettypaperpatisserie.blogspot.co.uk/2013/03/hand-made-flowers-tutorial.html
I added some butterflies with beaded bodies.
Tutorial here http://theprettypaperpatisserie.blogspot.co.uk/2012/06/hand-made-stick-pins.html
I added some funky fibres.
I added an extra three title pieces that I cut from another sheet of the pretty paper.
I then added a die cut swirl which I cut from chipboard and painted.
Last but not least I added the title with some stickers.
I hope you like it.

SCRAPPY STASH
Plain pink cardstock
Grey scalloped cardstock
Bo Bunny pretty paper
White doilies
Tim Holts die cut swirl
Chipboard
White paint
Hand cut butterflies
Beaded pins
Funky fibres in white
Assorted flowers
Prima green leaf
Scallop edge scissors
Title stickers.

Friday, 7 June 2013

STUCK ON U SKETCHES DESIGN TEAM REVEAL - June 7th - HATS


Hi everyone and WELCOME TO THE STUCK ON U SKETCHES DESIGN TEAM REVEAL.
SKETCH DESIGN BY SANDI CLARKSON

http://stuckonusketches.blogspot.co.uk/
 
For this sketch I decided to cut my photos into rectangles.I used the pink from Jessies hat for my colour scheme. I have to say I struggled with this one a bit as I am not used to white space!!!! I feel the need to fill it all up! Anyway, this is what I did-
I used some pretty papers which I fussy cut and matted in pink and then brown.
I attached  these to some pink cardstock which I cut down to 11x11 inches.
I attached this to neutral coloured cardstock that I cut down to 11.5 x 11.5 ins.
I attached this to my 12x12 pink cardstock.
I tucked some rectangle doilies underneath opposite sides, added my photos and started to decorate.
I added lots of flowers, a little clay bird on a branch, mini roses, butterflies and one of my beaded pins. 
I also attached some white twine across the centre to bring the page together. (The need to fill?).
I added my sticker title and there you have it.

Do give this a go and dont forget to visit all the other designer blogs for more inspiration.
Have fun and happy scrapping. Bye For Now.

SCRAPPY STASH
Plain cardstock
Pretty papers
White rectangular doily
White twine
Beaded stick pin
White Martha Stewart Clay Kit bird on a branch
Assorted flowers
Butterflies
Sticky back pearls

Friday, 31 May 2013

ORGANIC


Happy Friday everyone, I cant believe its the last day of May!!!


Here is a layout I have just finished. I have used a sketch from Cest Magnifique Kit club for my inspiration. I loved this sketch - you can find it here. http://cestmagnifiquekits.blogspot.co.uk/2013/05/our-may-sketch-challenge.html

 
For this layout I knew I had to use this tree bark paper for the backing as it mirrors the oak tree in the photo. I applied some gesso over it to soften it down a little. Anyway, here is what I did.
 
I cut down my bark paper to 10.5x10.5 inches and matted it onto some green cardstock, which I matted onto brown and then onto more green.
I matted my photo in blue to mirror Jessies blue eyes.
I adhered the photo to a circular doily and onto an oval doily.
I attached this to my background.
Then I die cut two decorative accents for the edges.
I gathered up all my matching embellies and started to decorate.
I added three butterflies and attached my beaded stick pins for the bodies.
I added a small banner in the top right corner with some mini roses.
I added the chippie title which I painted and inked.
That's it, a quick and simple layout which should only take you about an hour if you have all your stash together.
Why not give it a go.
 
SCRAPPY STASH
Plain cardstock
Bark background paper
Gesso
Doilies
Circle cutter
Assorted flowers
Sticky back pearls
Butterflies
Sizzix Decorative Accent Die #2
Chipboard title.


Thursday, 30 May 2013

SKETCHABILITIES DESIGN TEAM REVEAL SKETCH #92 FOREST - BUILD A PAGE


Good morning WELCOME TO THE SKETCHABILITIES DESIGN TEAM REVEAL #92

I love this sketch and I hope you do too. There is lots of inspiration to be had at all the designers blogs so don't forget to go visit them all.
This is how I put mine together in 10 easy steps.
(Scroll down to the end for a chance to win a prize).
 First choose your background cardstock.
 Next I chose a Prima pretty paper and cut it down to11.5x11.5 inches - ink the edges.
I then used some gesso and mists to the background to soften it up a bit.
 I matted my two photos and inked the edges.
 I made some banners and adhered these and added a doily that I cut in half.
 I added a small corner piece of plain matted cardstock.
 I chose all my embellies.
I added a scalloped border using my scallop ruler (then ink).
 I added the side border that I cut from some patterned paper.
I added a cardboard layer that I painted white and made lots of little banners using a stamp.
Then I started to embellish.
I added my butterflies, a little bird and the title.
And there you have it, once you have all your bits n pieces ready this shouldn't take too long at all.

SCRAPPY STASH
Plain card
Pretty paper by Prima
Ruler border from K&Co paper
Doily
Cardboard
Gesso and white paint
Green and brown chalk ink
Assorted flowers
Scallop scissors for some of the flowers
Scallop ruler
Butterflies
Stick pins
Banner stamp
Clay bird on a branch (Martha Stewart kit)
Sticky back pearls
Assorted flowers
Fuzzy felt stickers for the title
See spiral flower tutorial here http://theprettypaperpatisserie.blogspot.co.uk/2013/03/hand-made-flowers-tutorial.html
SCRAPPY PRIZE
To be in with a chance to win a pack of flowers, become a follower, leave a comment to say so, and I will pick a winner at the end of the challenge.
Have fun, thanks for visiting, bye for now.